
Objects with text combine a graphic shape and editable lettering in one reusable design element. In Mail Designer 365, you can add a ready-made object, replace its sample wording, and adjust the typography without rebuilding the artwork from scratch.
What are objects with text?
Some graphics in the Contents library include an editable text layer. These elements are useful for labels, badges, short calls to action, announcements, and decorative headings. The background graphic keeps its shape while the wording can be adapted to your campaign.
Choose a text object when you want a compact visual message that remains easy to customize. For longer copy, links, or paragraphs, a regular text area is usually more flexible. See the guide to editing a text area for that workflow.
Add an object with text
- Open the Contents section in Mail Designer 365.
- Choose Graphics and browse for an object that contains sample wording.
- Drag the object into an image area in your email design.
- Position and resize it so the complete shape remains visible.
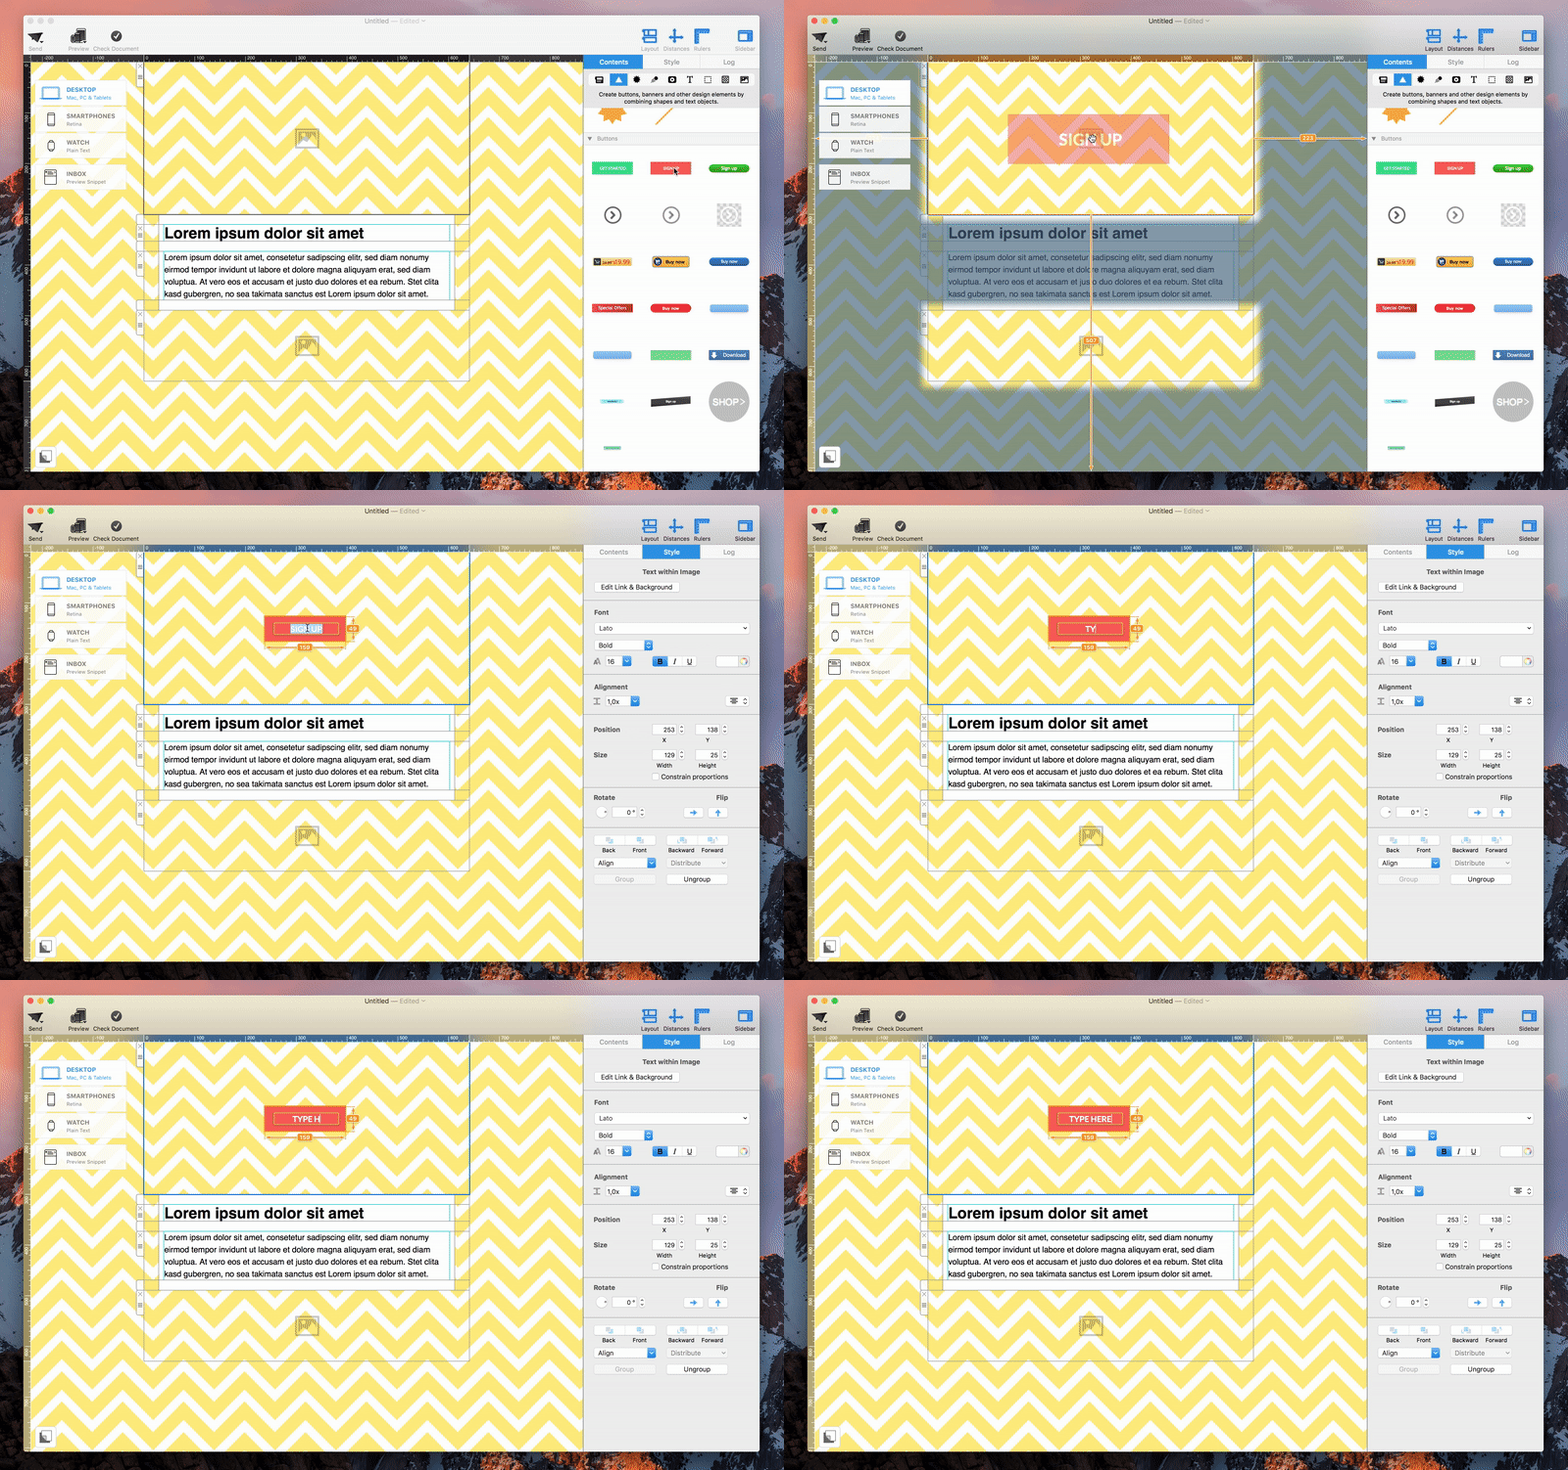
The red “Sign Up” graphic is one example of an object with editable wording. Insert it into an image area before changing the text.

Edit the wording and typography
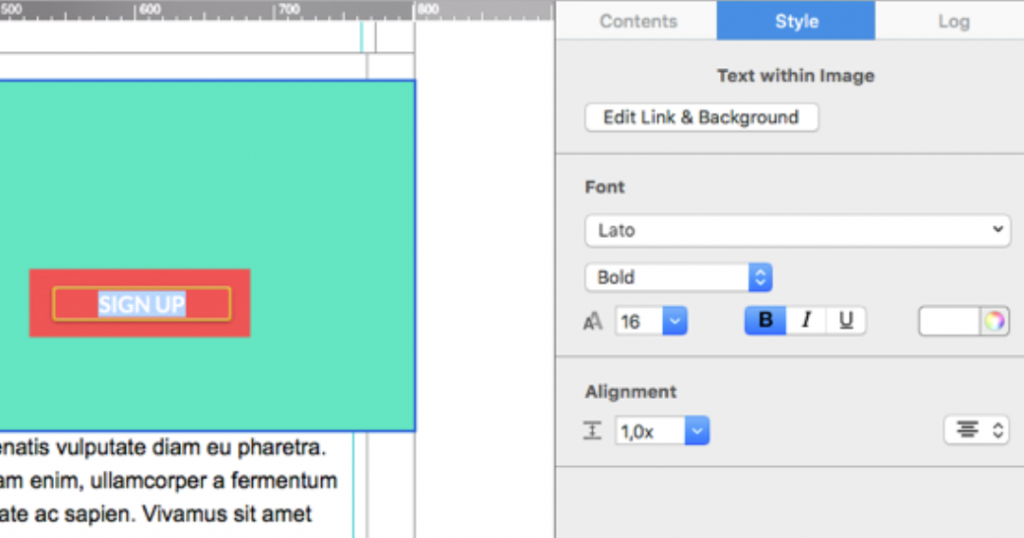
Double-click the sample wording in the object, then type your own short message. Select the text when you want to change its font, size, style, color, or alignment. Keep the wording concise so it fits comfortably inside the graphic at desktop and mobile widths.
The animation below shows the basic workflow: select the object, activate its text layer, replace the wording, and review the finished result.
Keep text readable inside the graphic
Use strong contrast between the lettering and its background. If the object has a busy texture or bright color, choose a simple font and avoid thin weights. Leave enough padding around the text so letters do not touch the edge of the shape.
Check capitalization, punctuation, and line breaks before finalizing the object. A short phrase such as “Shop Now” or “Register Today” is often easier to scan than a complete sentence. If your message wraps awkwardly, reduce the font size slightly, widen the object, or shorten the wording rather than squeezing characters together.
Resize and arrange the object
Resize the object proportionally when possible so the original artwork does not look stretched. After resizing, click the text again and confirm that it is still centered and that no letters are clipped. If several elements overlap, use the arrangement controls to move the object forward or backward.
For more information about adding and organizing graphic elements, follow the guide to adding and duplicating graphics and shapes.
Check desktop and mobile layouts
Open both layout previews and inspect the object at realistic widths. A design that fits on desktop may become too small to read on a phone. Make sure the object does not cover other content and that surrounding spacing remains balanced.
If the graphic contains an essential call to action, verify that the image area or associated element uses the intended destination link. Send a test email and check the rendered result in at least one desktop and one mobile email client. Image scaling can differ between clients, so this step is more reliable than reviewing the canvas alone.
Troubleshoot common problems
If double-clicking does not activate the wording, confirm that you selected a graphic designed with editable text rather than a flat image. If the text disappears, check its color, layer order, font size, and position inside the object. Undo the last change if the element was accidentally moved or resized.
When a long translation no longer fits, create a language-specific version of the object with shorter copy and appropriate typography. Do not reduce the text until it becomes unreadable. Finally, test the finished objects with text in the complete email so their visual weight supports the surrounding headline, body copy, and call to action.
How Can We Help?