Once you're happy with your email design, you can go ahead and send it as an email campaign to your audience.
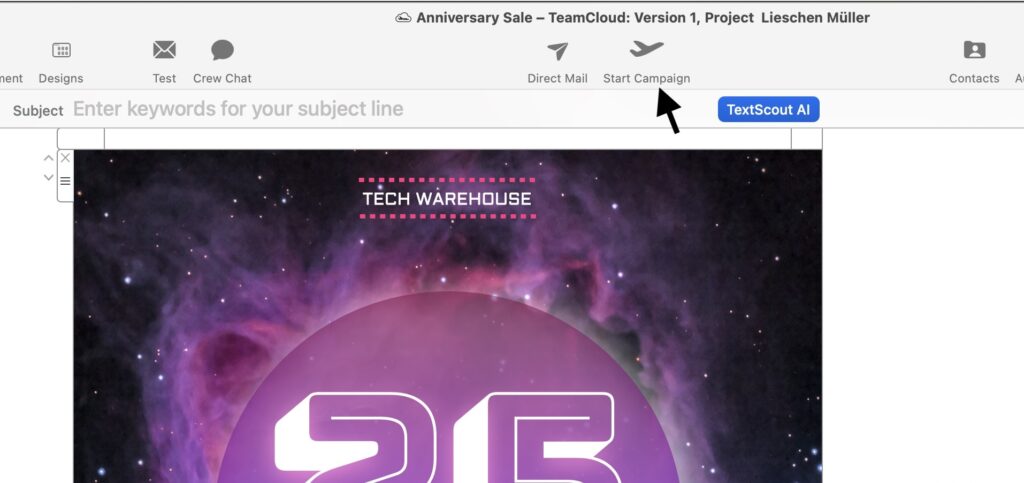
To get started, open up the template you would like to send and click on Start Campaign in the Mail Designer 365 toolbar:
The latest version of your design will be saved to your Project and Campaigns will open in your Mail Designer Main Window:
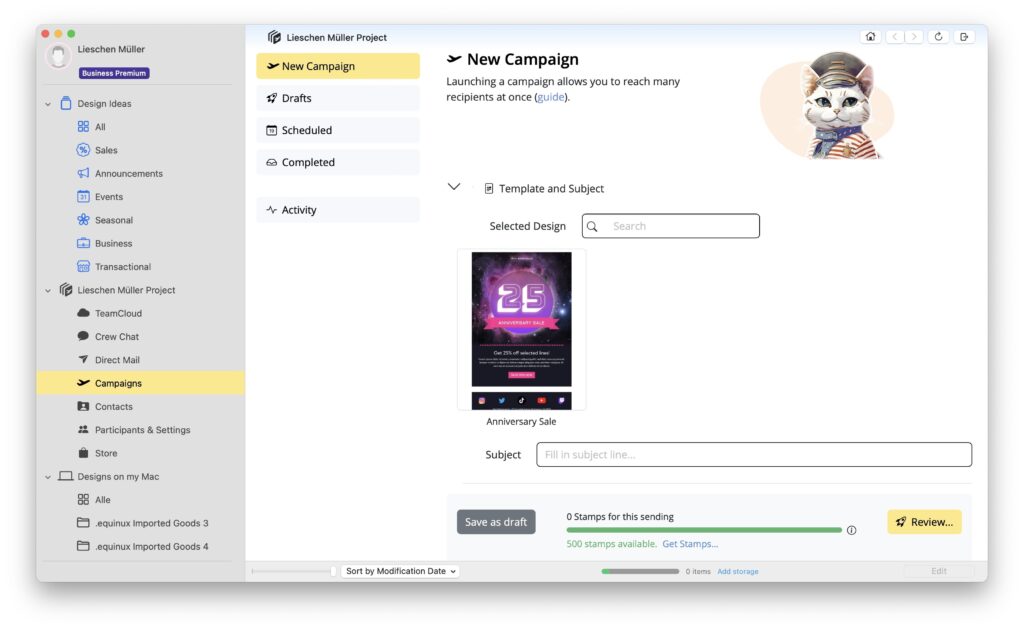
Template and Subject
Click on your template to select it, and check your the subject of your email. This subject will be used as the subject in the inbox.
Once your Template and Subject is filled, you will see a green Checkmark next to Template and Subject. Scroll down to continue.
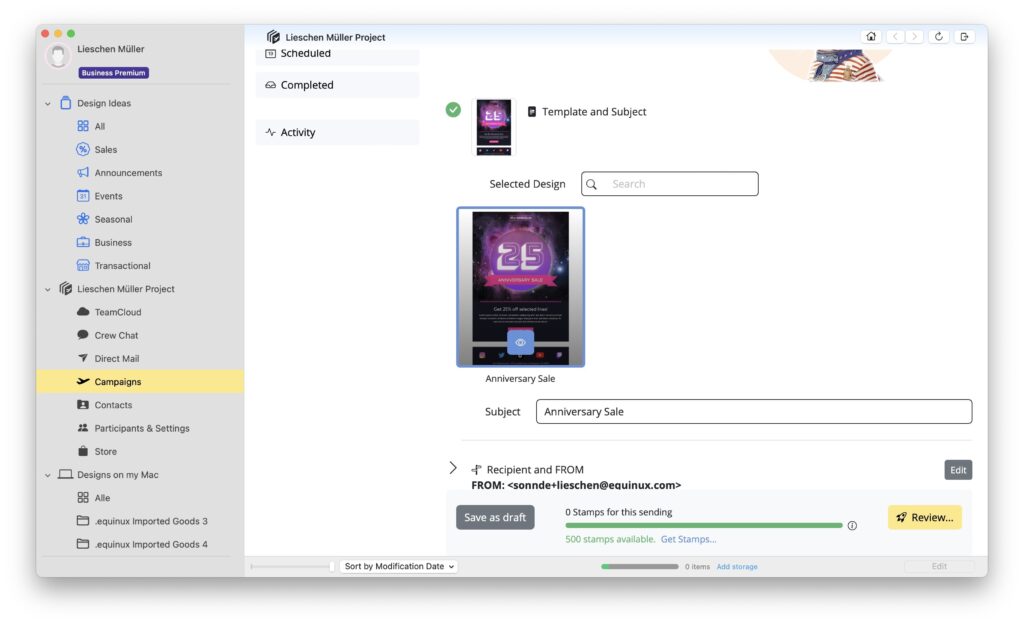
Next, scroll down to the Recipient and FROM Section
Recipient and FROM
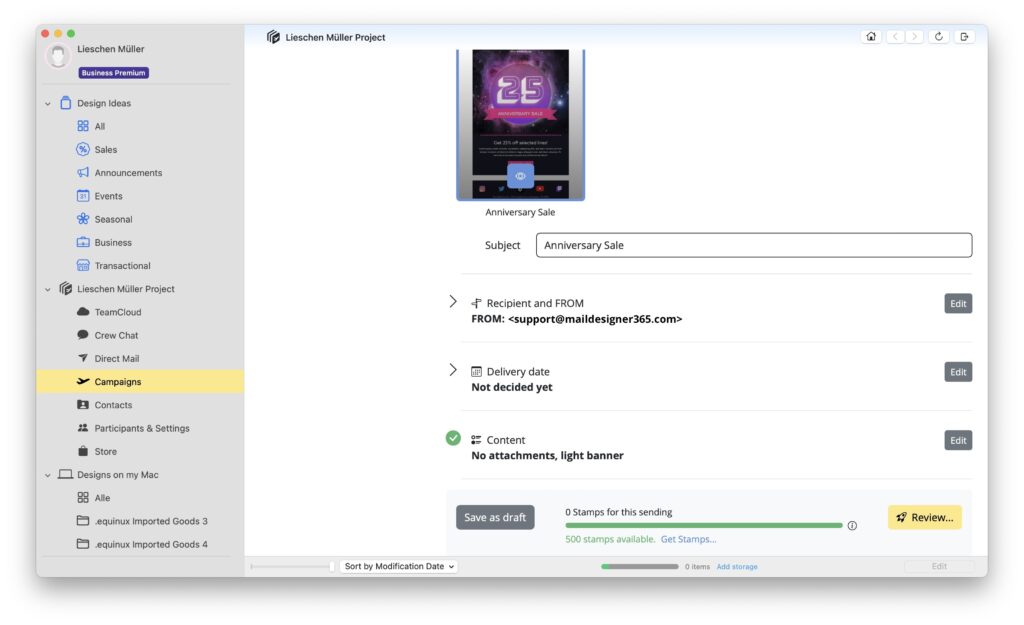
Click on Edit to select your Audience and check your from address:
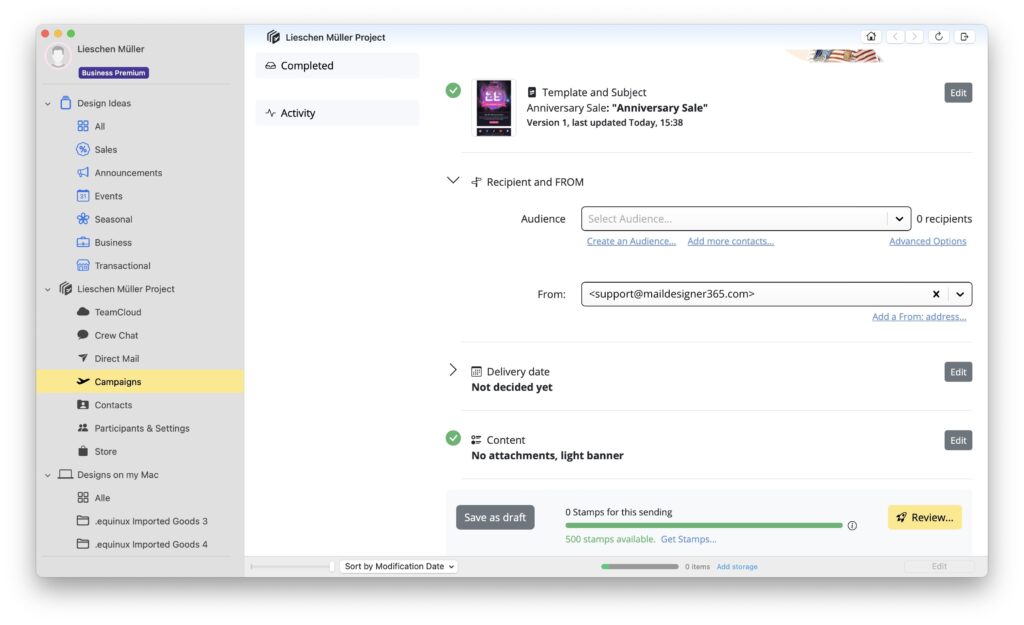
Now select your audience. These are the contacts who will receive your email campaign. Choose All Contacts to send your email to everyone or, if you have already set up custom audiences, choose one from the dropdown menu:
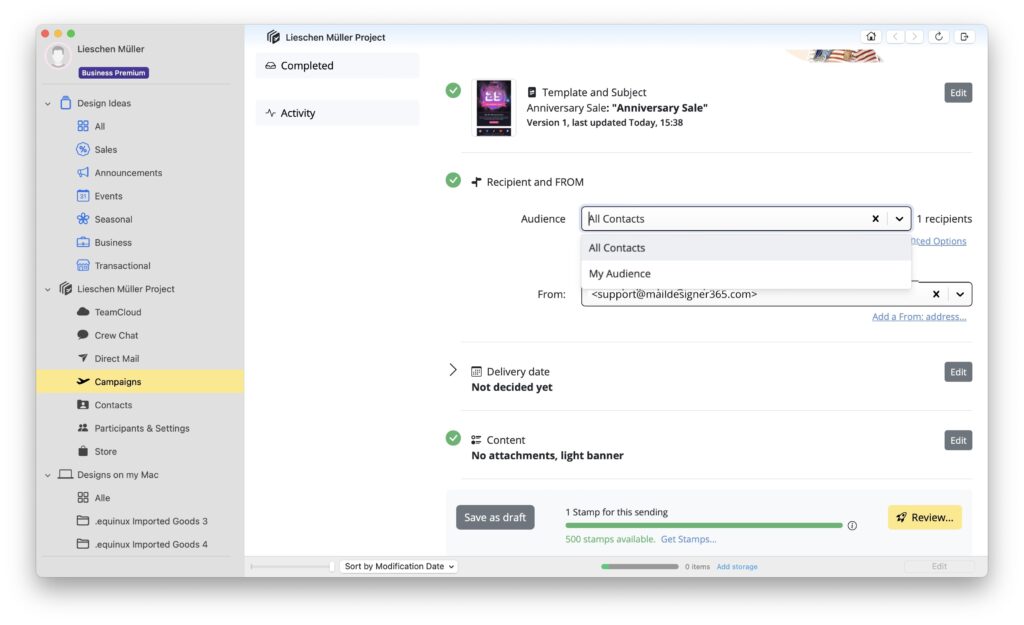 Next check if your FROM address is correct. This is the address your campaign will be sent from.
By default, Mail Designer 365 will pre-fill this field with your last-configured address. If you have multiple addresses configured, choose one from the dropdown menu. If you want to add a new address, go to Participants & Settings in the sidebar menu.
All set? Make sure you have a green Checkmark next to the section: Recipient and FROM!
Delivery Date
Following this, you can decide when to send your campaign. Click Edit next to the Delivery Date section. Choose to send now or schedule it for a future date. Alternatively, choose Not decided yet to save it and come back to it later.

All set? Make sure you have a green Checkmark next to the section: Delivery Date!
Additional Settings
You can optionally configure additional settings under the section Content. Options you can set here include:
- Attachments for your email
- Banner options
- Link tracking options
- Internal name for your campaign.
Ready to send?
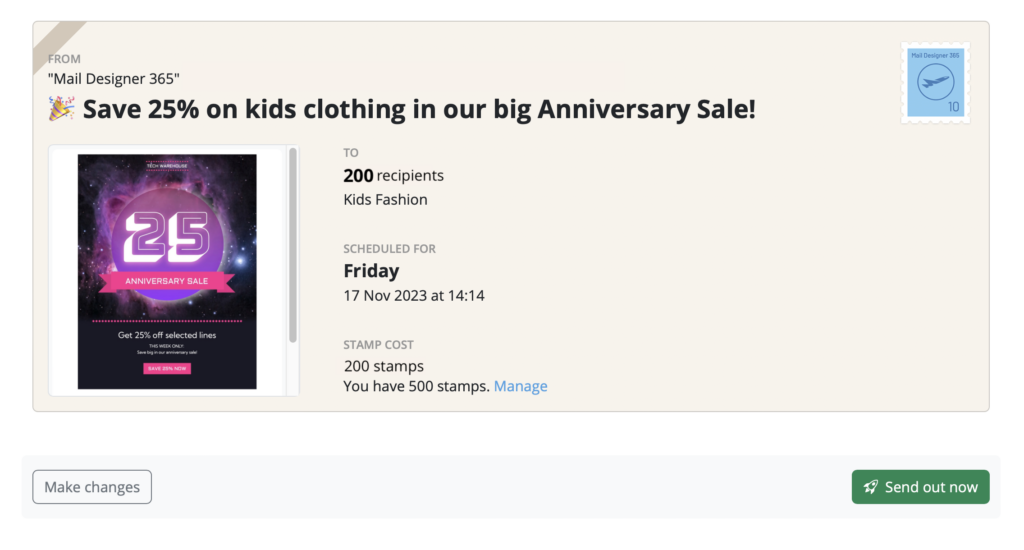
Press Review to do a final preflight check of your campaign before sending.

You will now be given one final opportunity to look over your campaign details before sending to your audience:
How Can We Help?
A Quick Tour of Mail Designer 365
Background
Layout Blocks
TextScout
Editing Text
Links and Buttons
Configuring Text Styles
Tables
Image Areas
Images
Using Retina Images with your Design
Graphics and Other Objects
Creative Tools
Advanced Design Techniques
Blend Modes
Optimizing your Template for Mobile
Plain Text
Preview your Design
Feedback and Sharing
Preparing your Design for Sending
Contacts and Audiences
Sending Emails
1:1 Emails
Email Analytics
HTML Export
Other Sharing Options
