
Rotating objects in Mail Designer 365 lets you angle shapes, graphics, image masks, and text areas for a more dynamic email layout. Select the element first, switch from resizing to rotation with the Command key, and use the angle indicator to control the result.
Select the object you want to rotate
Click the graphic, shape, mask, or text area in the image area. Selection handles appear around the element so you can resize or rotate it.

Moving a normal corner handle changes the size of the selected object. Check the cursor before dragging so you do not resize the element when you intend to rotate it.

Rotate an object with Command-drag
Hold the Command key and move the pointer over a corner resize control. The cursor changes to a rotation icon. Keep Command pressed, click the handle, and drag to rotate the object freely.

Use small movements when you need a subtle angle. A strong rotation can add energy to a badge or decorative shape, but it may reduce readability when applied to long text or important information.
Read the rotation angle
While dragging, Mail Designer 365 displays the number of degrees applied to the object. Use this label to create a deliberate angle or repeat a similar rotation on another element.


If several decorative elements should feel consistent, note the angle and apply a matching value visually. Then check alignment and spacing again because the rotated edges may extend beyond the original area.
Rotate a text area
Select the text area, hold Command, and drag a corner when the rotation cursor appears. Keep the angle modest enough for readers to scan the message comfortably.

Avoid rotating paragraphs, legal text, or essential instructions. Short labels and decorative words are better candidates. After rotation, verify that no letters are clipped and that the text remains large enough on mobile devices.
Rotate text and a shape together
When text belongs with a graphic, group both elements before rotating them. Hold Command and click the shape and text area so both are selected.

Choose Group in the sidebar. Grouping preserves the relationship between the elements while they move and rotate.
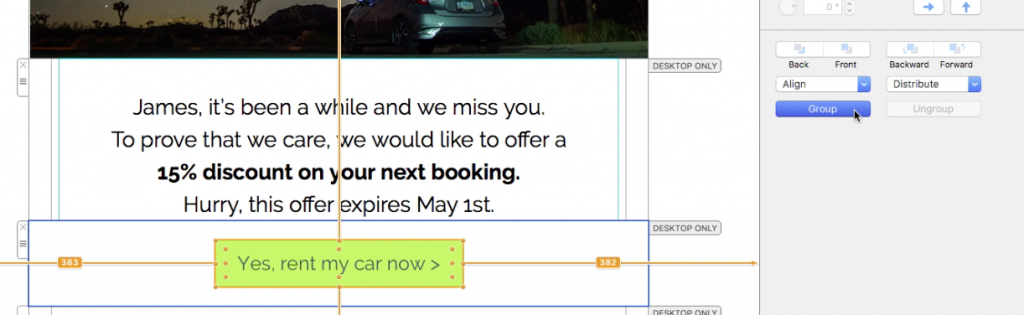
Hold Command and drag a corner handle on the group. The cursor changes to the rotation icon just as it does for a single object.

Both elements now rotate together without changing their relative placement.

For more grouping details, see how to group design elements. If rotated objects overlap, use the guide to move objects to the front or back.
Check desktop and mobile layouts
Preview both layouts after rotating objects. Confirm that angled edges remain inside the image area, text stays readable, and the object does not cover nearby buttons or content. A rotation that looks balanced on desktop may need repositioning in a narrower mobile arrangement.
Send a test email and inspect the rendered result in desktop and mobile email clients. Pay attention to image scaling, transparent edges, text clarity, links attached to rotated objects, and the spacing around the group.
Troubleshoot rotation problems
If dragging resizes the object, undo the change and hold Command before using the corner handle. If multiple elements rotate separately, group them first. If a rotated element is clipped, move it farther from the image-area edge or reduce its size.
When an angle feels inconsistent, use the displayed degree label as a reference and repeat the rotation carefully. Finish by checking all rotating objects within the complete campaign so their angle supports the hierarchy instead of distracting from the main message and call to action.
How Can We Help?