How to Edit Text in an Image Area for Email

You are here:

Edit a Mail Designer Text Object

If you want to know how to edit text in an image without flattening your entire email design, use a Text Object inside a Mail Designer 365 image area. Text Objects let you create decorative headlines, labels, badges, prices, or short calls to action while keeping each element movable and editable.

Use image-area text for visual accents rather than essential newsletter copy. Normal text areas remain the best choice for paragraphs, legal information, and important calls to action because recipients can select the text, screen readers can interpret it, and email clients can resize it more reliably.

1. Add a Text Object to the Image Area

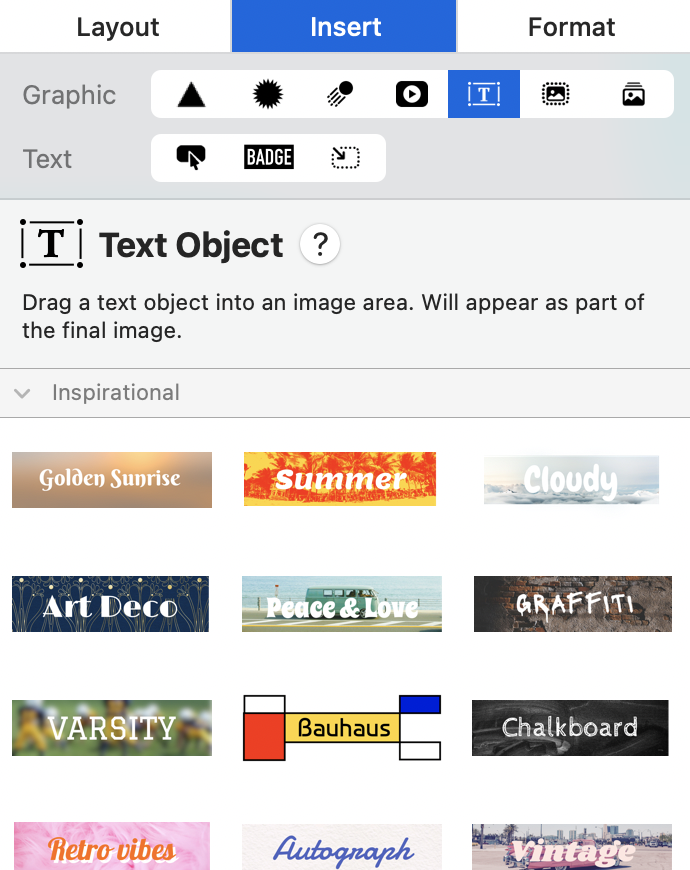
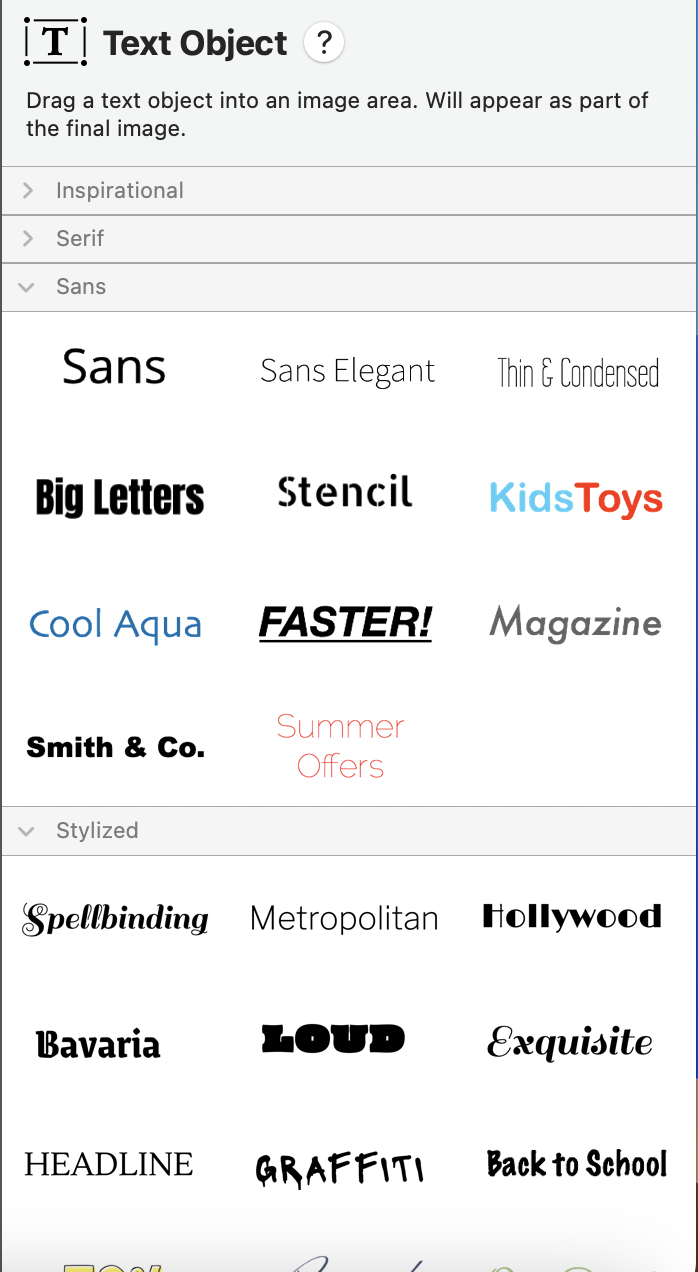
Open Insert in the Mail Designer 365 sidebar and choose Text Objects. Browse the available styles, then drag a suitable Text Object into the image area in your email design. Place it over the background photo, color block, shape, or other visual element where the text should appear.

Choosing a Text Object to add editable text to an image area

2. Edit the text in the image area

Double-click the Text Object to activate its text-editing mode. Select the placeholder wording and type your own message. Keep the copy short enough to remain readable on smaller screens. A brief headline or label is usually more effective than a full paragraph inside an image area.

If double-clicking selects the image area instead of the text, click the Text Object once and then double-click directly on its characters. You can also zoom in temporarily when several design elements overlap.

Editing stylized text positioned over an email image area

3. Format and position the edited text

With the Text Object selected, adjust its font, size, color, alignment, and other available style settings. Choose enough contrast between the text and the background image. If the photo is visually busy, add a solid or translucent shape behind the text so the message remains legible.

Drag the Text Object to reposition it and use Mail Designer 365 alignment tools when you need precise placement. Leave comfortable space between the text and the edges of the image area. Preview the desktop and mobile versions separately because an attractive desktop arrangement may become crowded on a narrow screen.

4. Keep important email copy accessible

Text placed in an image area becomes part of the rendered graphic. Recipients may not see it when images are blocked, and assistive technology cannot read it like normal HTML text. Do not use image text as the only place for a discount code, deadline, price, event time, or essential instruction.

Repeat critical information in a normal text area and provide meaningful alternative text for the finished image. Describe the purpose of the visual rather than every decorative detail. For more guidance, see using alt text in Mail Designer 365.

5. Test the edited image text before sending

  • Preview both desktop and mobile layouts.
  • Confirm the text is not cropped or hidden by another object.
  • Check contrast at the actual display size.
  • Send a test email and view it with images enabled and disabled.
  • Verify that important information also appears as real text.

Troubleshooting text in an image area

The text cannot be edited: Make sure you inserted a Mail Designer 365 Text Object. Text that is already embedded in an imported JPG or PNG cannot be changed as a separate object; edit the source image or cover it with a new design element.

The text looks blurry: Avoid enlarging a small rendered object, check the image-area dimensions, and preview at 100 percent. Keep body copy in a normal text area for consistently sharp rendering.

The text moves on mobile: Open the mobile layout and reposition or resize the Text Object there. Test again after every substantial change to the image area.

Privacy Settings / Datenschutz-Einstellungen