Add a table to an email design

By Team equinux Tables

Add a table to an email design

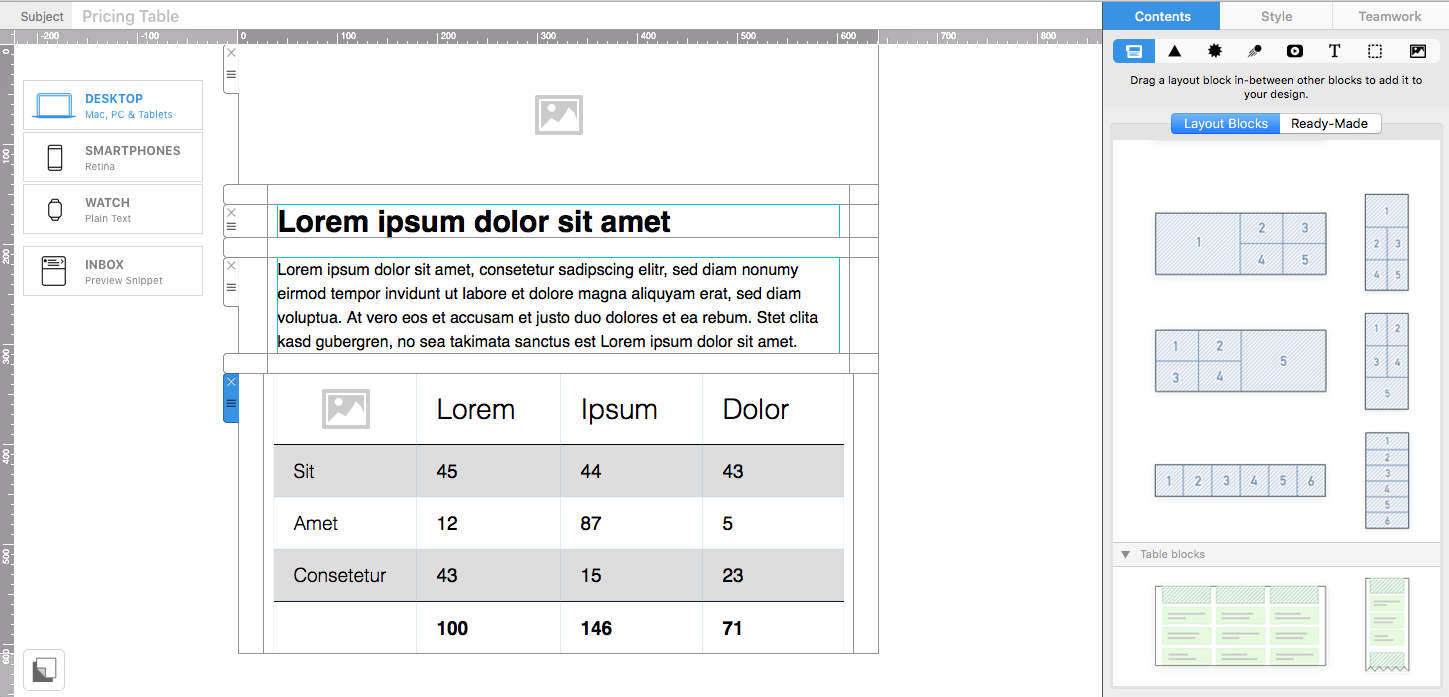
Add a table to an email when readers need to compare structured information such as product options, event schedules, prices, contact details, or feature lists. Mail Designer 365 provides table layout blocks that help organize this content inside a responsive email design.

This guide explains how to open the Tables section, choose a layout block, place it in the design, and prepare the table for desktop and smartphone readers.

Plan the table content

Decide what recipients need to compare before choosing a table layout. Keep the number of columns manageable and use short labels. Email tables should summarize information clearly rather than reproduce a large spreadsheet.

For example, use a table for a three-option pricing overview, a short event agenda, or a list of opening hours. If the information requires many columns or extensive interaction, link to a web page instead.

Open the table layout blocks

  1. Open the email design in Mail Designer 365.
  2. Select the Contents menu.
  3. Click the Layout blocks tab.
  4. Scroll to the Tables section.

The Tables section contains ready-made structures with different rows and columns. Review the previews and choose the simplest block that can hold your information.
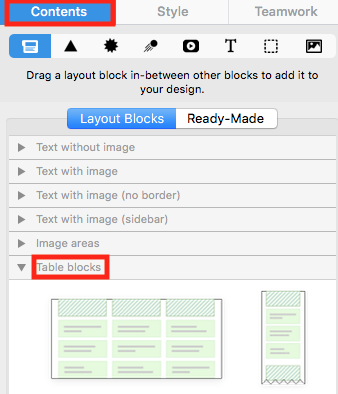
Open the Tables section to add a table to an email

Drag the table into the design

Drag the chosen table block from the Contents panel into the email. Watch the placement indicator and release the block where the information should appear. Existing layout sections move to show the insertion point.

If the block lands in the wrong position, undo the action and place it again before adding content. Positioning the structure first is usually easier than moving a completed table later.
Drag and drop a table layout block into the email design

Build the table content

Replace the placeholder content with concise headings and values. Keep each cell focused on one item and use consistent formatting across rows and columns. Important labels should be distinguishable from the values they describe.

Continue with building your table layout for the detailed editing workflow.

Write for small screens

Tables have limited horizontal space in email, especially on smartphones. Use short headings, avoid long unbroken text, and check how the columns adapt in the mobile version. When a wide comparison becomes difficult to scan, consider using fewer columns or splitting the information into separate sections.

Do not reduce text to an uncomfortable size merely to fit more data. A shorter table with a link to full details usually gives mobile readers a better experience.

Make the table easy to understand

  • Introduce the purpose of the table in nearby text.
  • Use clear row and column labels.
  • Keep formatting and alignment consistent.
  • Use sufficient contrast between text and backgrounds.
  • Avoid using color as the only way to communicate meaning.

Readers should be able to understand the information even when images are blocked or the email client changes some styling. Use live text for important table content whenever possible.

Add links and calls to action carefully

If a cell contains a link, use descriptive wording and provide enough space for mobile tapping. For comparison tables, one consistent action per option is usually clearer than several competing links inside every row.

Check each destination individually. Reused or copied table blocks can retain old URLs, so never assume links are correct simply because the visible text has been updated.

Preview and test the email table

Preview the design in desktop and smartphone views. Look for clipped text, crowded columns, uneven row heights, or information that appears in an unexpected order. Then send a test email to the clients and devices important to your audience.

Confirm that the table remains readable, all links work, and the surrounding email still has a clear visual hierarchy. Save the design once the desktop and mobile versions are verified.

Build an email table in Mail Designer 365

How to Build an Email Table Layout

By Hans-Peter Tables

An email table gives you a structured way to arrange rows, columns, and content in a Mail Designer 365 layout. This guide shows you how to create an email table, change its structure, resize rows and columns, and prepare the layout for styling. Start with the information recipients need, then choose a table structure that remains easy to scan on smaller screens.

How to configure an email table layout

To get started, decide how many rows and columns your email table needs. Use only the cells required for the content so the message does not become crowded. You can add or remove rows and columns later, so it is fine to begin with a simple structure.

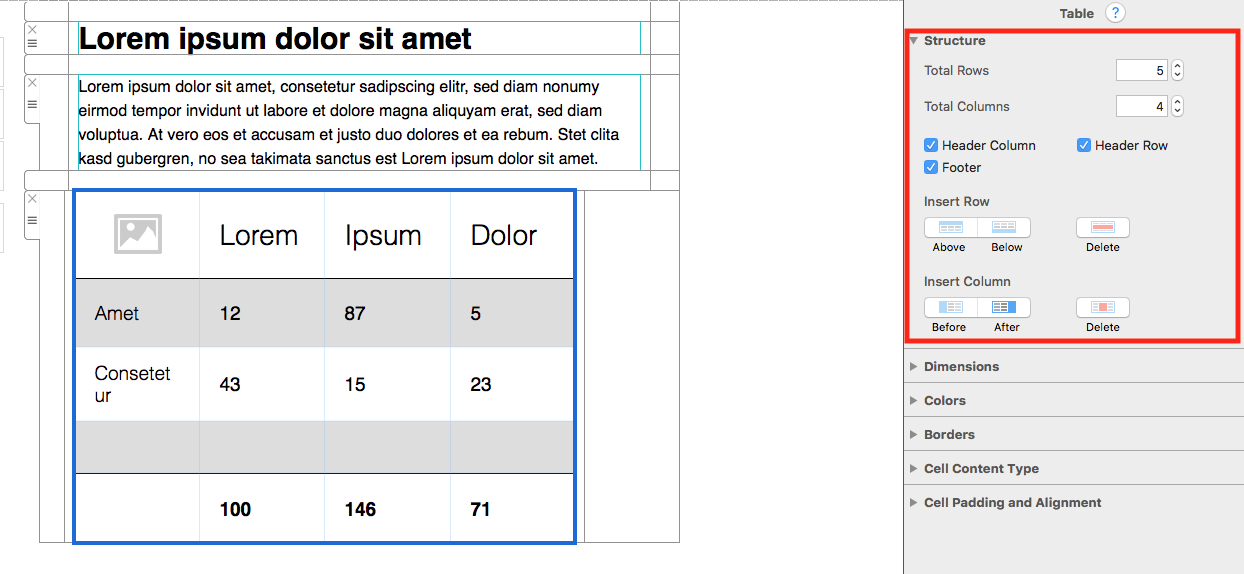
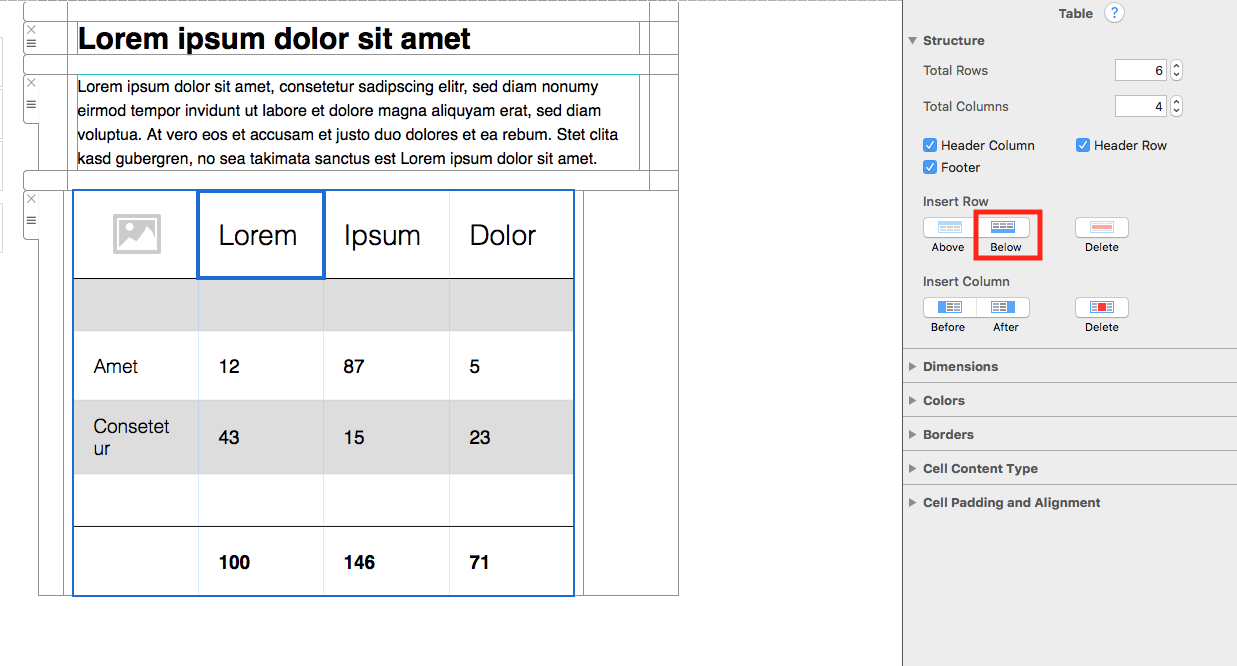
Click on the table. This will open the "Style" menu. Under "Structure", you can increase/decrease the number of rows and columns using the arrows. You can also use the selection tools to manually select (cmd + click) a cell in your table and insert a row or column above or below.

Email table structure controls in Mail Designer 365

Selecting rows and columns in an email table

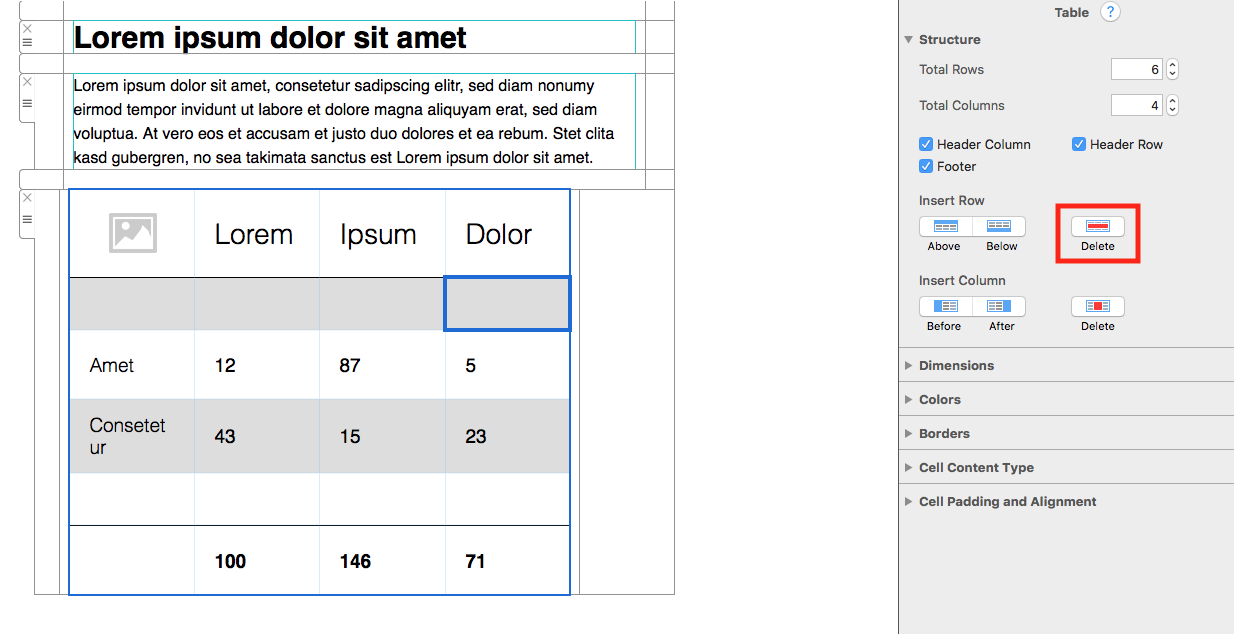
To delete a row or column, select (cmd + click) the cells and click on the delete button in the "Structure" menu.

Delete a row or column from an email table

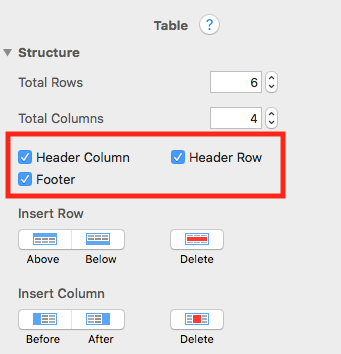
To activate different features in your table (e.g. headers, footers), you can check the tick boxes next to each feature:

Enable headers and footers for an email table

Resize your email table

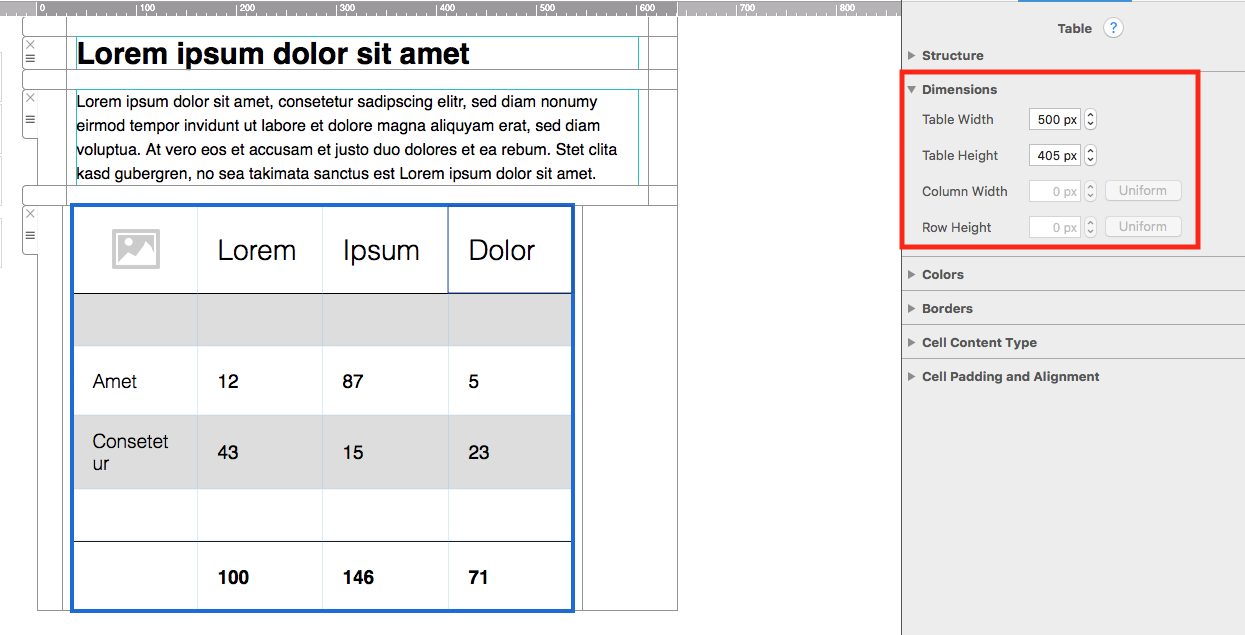
You can easily adjust the dimensions of your table by using the control panel. Click on your table and go to "Dimensions" under the "Style" menu. Next to each field (e.g. Table Width) you can enter a precise value, or manually adjust the dimensions using the arrow controls:

Resize an email table with the Dimensions controls

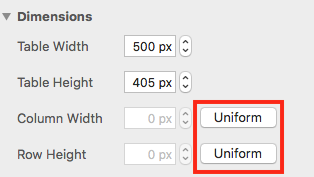
Click on the "Uniform" button to make all columns/rows equal in width/height.

Make email table rows and columns uniform

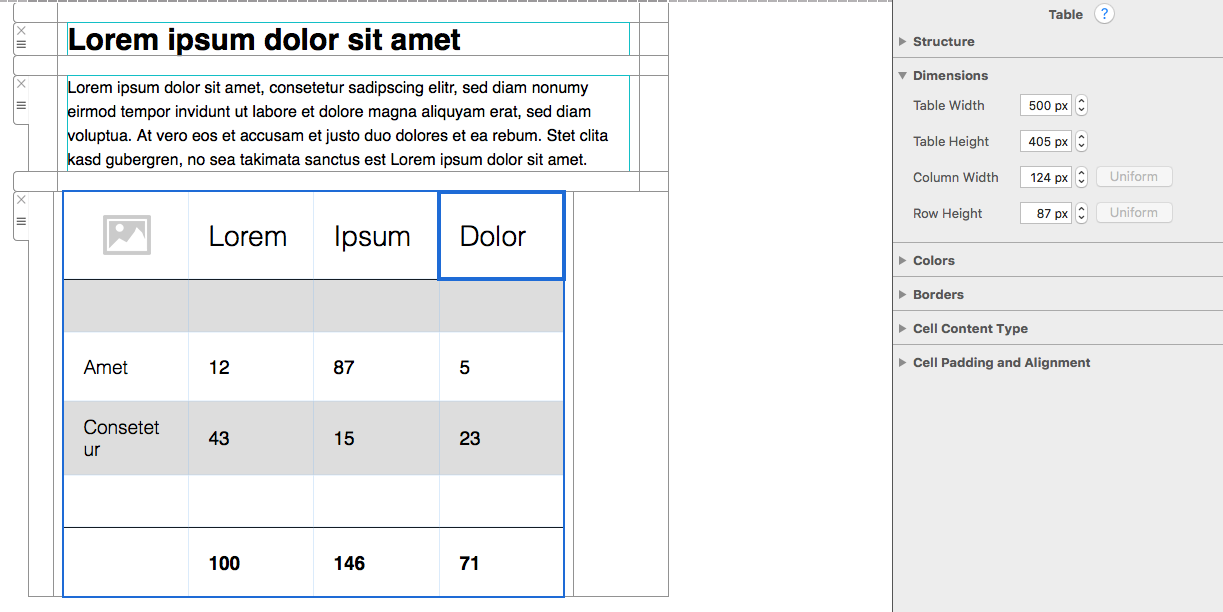
To change the dimensions of an individual cell within your table, click on the cell and use the controls as instructed above. Keep related columns consistent where possible. A predictable grid makes values easier to compare and reduces the chance that one cell draws attention for the wrong reason.

Check the table before sending

Review the completed email table in both the desktop and mobile previews. Check that labels are clear, text is not compressed, and the most important information is visible without unnecessary horizontal complexity. If the table feels difficult to scan, shorten the copy or reduce the number of columns rather than shrinking the text.

Send a test email to verify the layout in a real inbox. Table content can render differently across email clients, so check the message on the devices and inbox apps that matter to your audience. Also confirm that links, numbers, dates, and totals are correct before sending.

Common email table layout tips

  • Use a header row when recipients need to compare several values.
  • Keep column labels short and specific.
  • Use consistent alignment for similar data such as prices or dates.
  • Avoid adding empty rows only to create spacing; use the layout controls instead.
  • Preview the email table after every major structural change.

Adjust the dimensions of an individual email table cell

Once you're happy with the layout of your table, you can now go on to edit the style in the next step.

Change the Color of Your Table in Mail Designer 365

By Hans-Peter Tables

Change the color of your table in Mail Designer 365 to separate headings, highlight important values, and make rows easier to scan. The table Style controls let you apply a color to a complete area, alternate row colors, or emphasize one selected cell without rebuilding the layout.

Open the table color controls

Click the table in your email design, then open the Style menu. Expand the Colors section to see the available table areas and color controls.

Open the Colors section for an email table in Mail Designer 365

Before choosing a color, decide what the styling should communicate. A header color can identify labels, alternating rows can support scanning, and a highlighted cell can draw attention to one result or offer.

Select the table area to color

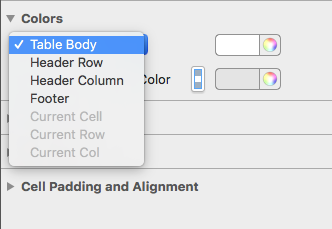
Use the dropdown menu in the Colors section to choose which part of the table you want to edit. Depending on the table setup, you can target a header, body rows, another defined table area, or the current cell.

Choose which table area should receive a new color

Confirm the selected area before changing the value. This prevents an accidental color change across the whole table when you intended to edit only one cell.

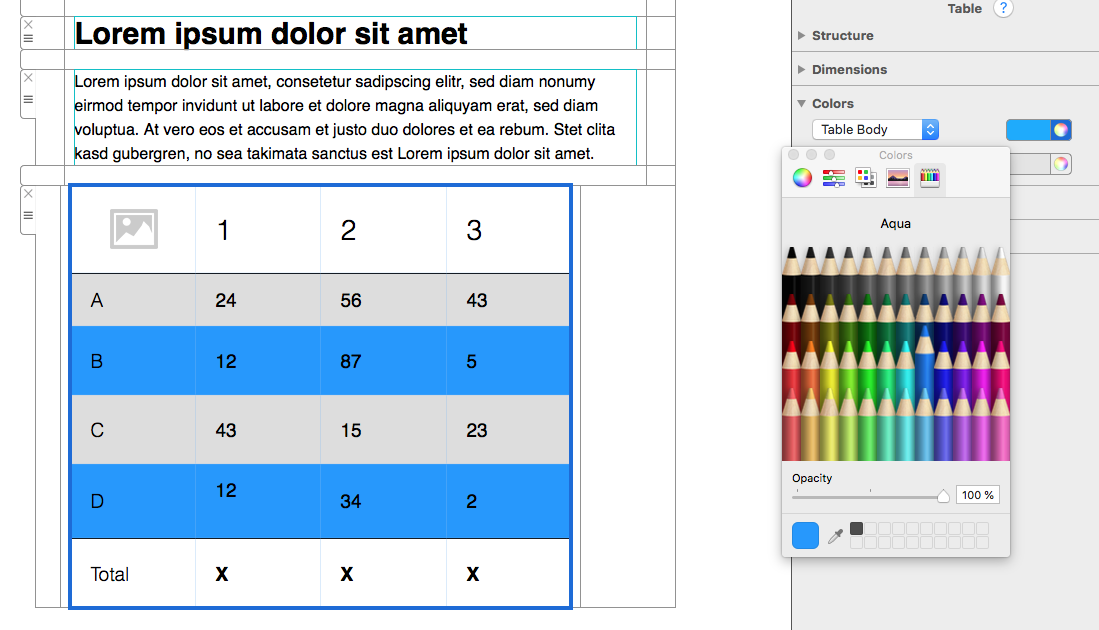
Choose a color from the color wheel

Open the color control and select a color from the wheel. Use a shade that fits the campaign palette and maintains clear contrast with the text inside the cells.

Select a table color from the Mail Designer color wheel

Avoid using color as the only way to communicate meaning. Labels, headings, and readable values should still explain the table when images are blocked or a reader has difficulty distinguishing colors.

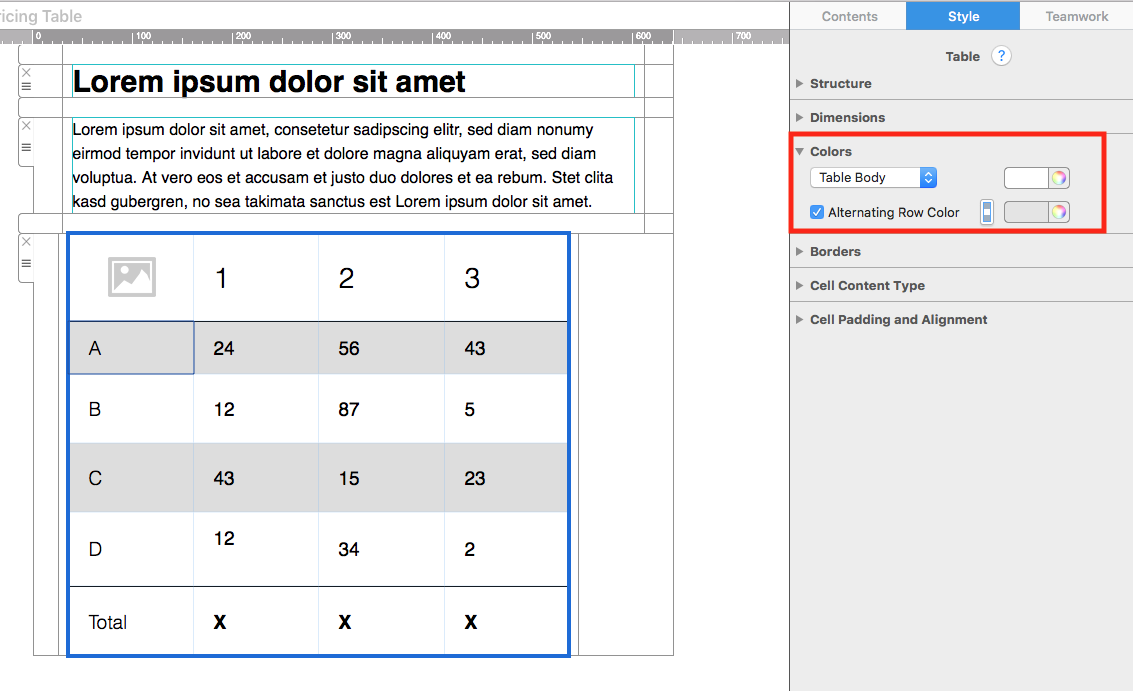
Use alternating row colors

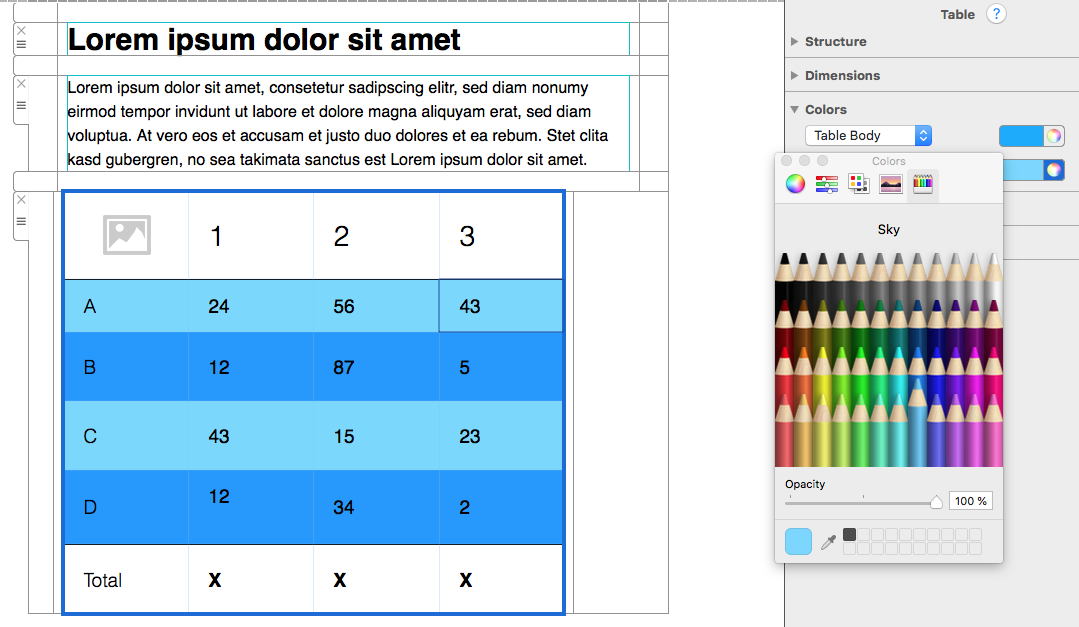
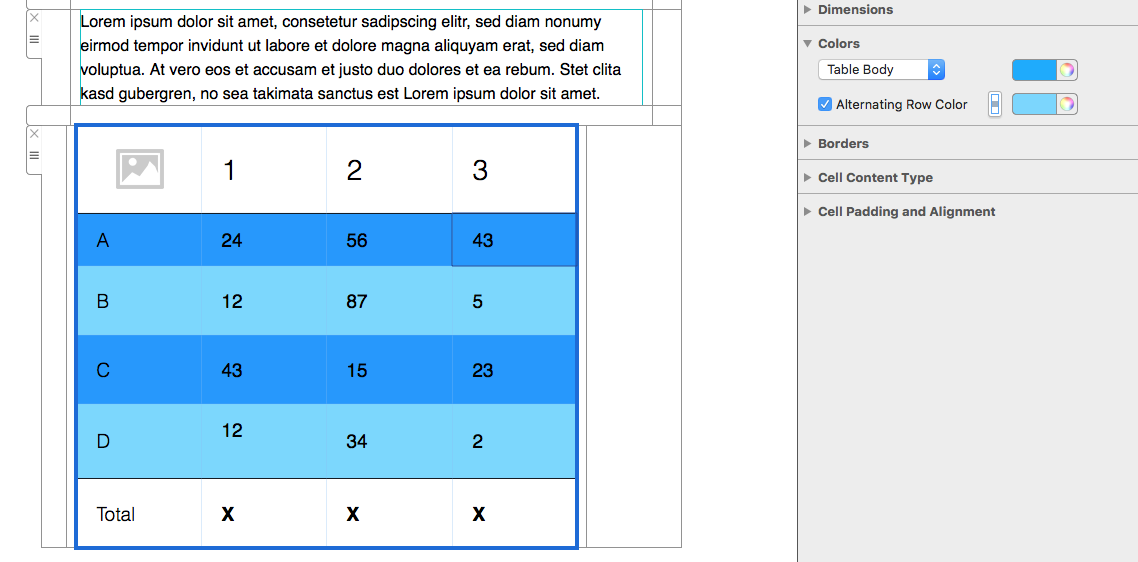
Enable Alternating Row Color when a table contains several rows that readers need to compare. A subtle second shade helps the eye follow one row across multiple columns.

Enable alternating row colors for an email table

Choose two colors with enough difference to separate rows but not so much contrast that the table becomes distracting. Light variations of a brand color often work better than unrelated bright shades.

Use the switcher button to reverse which rows receive the alternate color. This is helpful when the first or last row needs to match another section of the design.

Reverse the alternating row color pattern

Preview a table with alternating row colors

Change the color of one cell

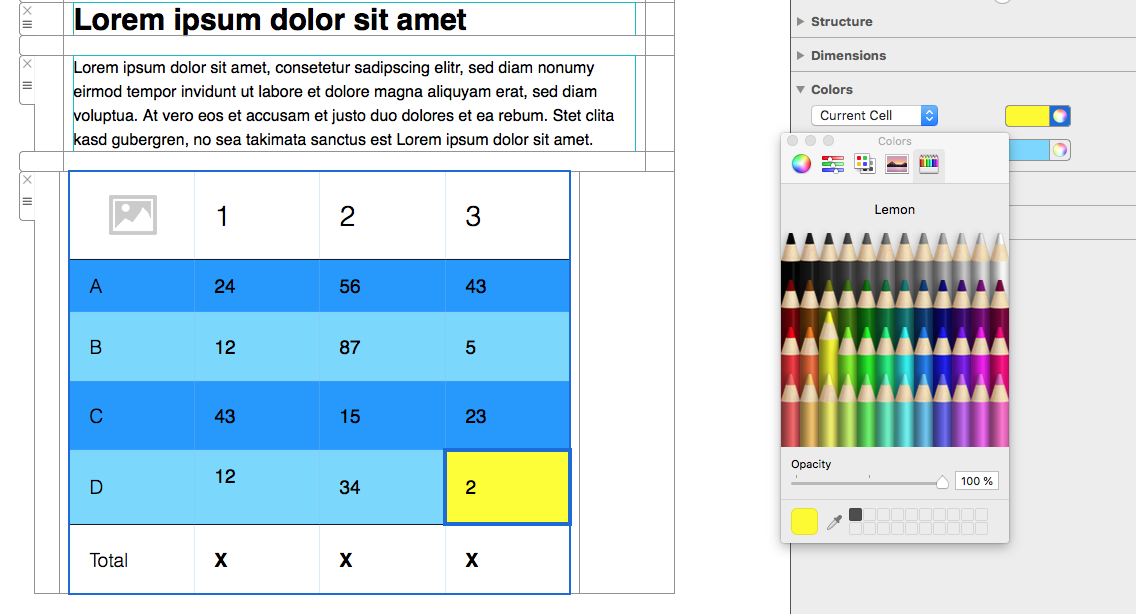
Select the cell you want to emphasize, then choose Current Cell from the area dropdown. Apply the new color and check that the text remains readable.

Change the background color of one selected table cell

Use single-cell highlighting sparingly. It works well for a recommended plan, total, deadline, or other value that deserves attention. Too many highlighted cells can weaken the hierarchy and make the table harder to scan.

Check contrast and brand consistency

Compare every background with its text color. Dark text usually needs a light cell color, while white text requires a sufficiently dark background. Check links separately because their default color may not provide enough contrast on the new shade.

Reuse a small set of approved brand colors throughout the campaign. Consistent table colors connect the data section with headlines, buttons, and other design elements without overwhelming the content.

Preview desktop and mobile layouts

Open the desktop and mobile previews after changing the color of your table. Confirm that alternating rows remain visible, highlighted cells still make sense, and text wrapping does not create confusing color blocks on a narrow screen.

Send a test email and inspect the table in more than one email client when possible. Review background rendering, text contrast, spacing, link visibility, and dark-mode behavior. Some clients adjust colors, so important labels must remain understandable without relying on a precise shade.

Troubleshoot table color changes

If the wrong area changes, undo the step and select the intended table section or current cell again. If alternating colors are not visible, confirm that the option is enabled and that the two chosen shades differ enough.

When text becomes difficult to read, change either the background or text color rather than adding more decoration. After the color scheme is complete, use the guide to adding borders to your table to refine separation without using an outdated or broken link.

Table border settings in Mail Designer 365

How to Add a Table Border

By Hans-Peter Tables

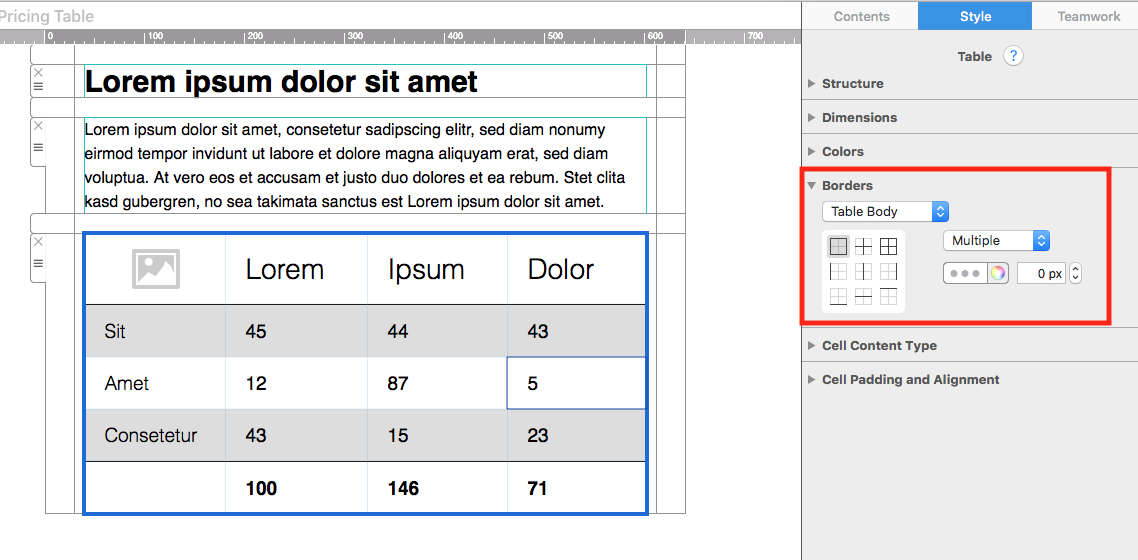
A table border can separate content, highlight important cells, and make a structured email layout easier to scan. In Mail Designer 365, select the table first and open Borders in the Style menu.

Borders panel for a table in Mail Designer 365

Apply a table border to the whole table

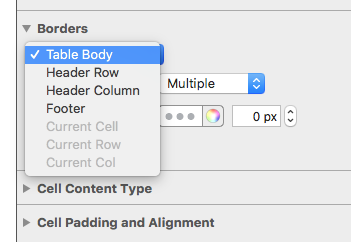
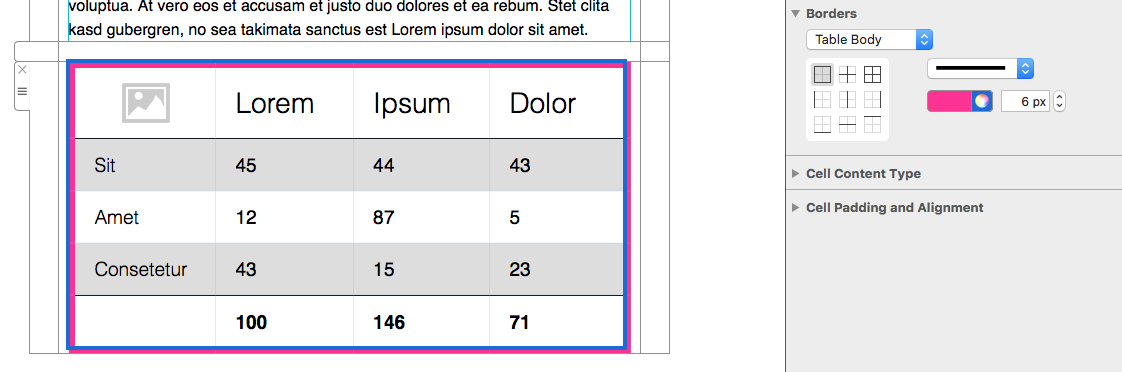
Open the area dropdown in the Borders panel. To apply the same border around the full table, choose Table Body. This keeps the change scoped to the table rather than unrelated design elements.

Select Table Body in the border area menu

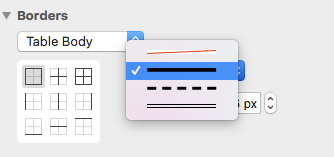
Next, choose a border style from the dropdown list. Adjust the thickness with the arrows or enter a pixel value manually. Start with a subtle width, then preview the result before increasing it. A very heavy table border can compete with the email content, especially on smaller screens.

Choose a table border style and thickness

Choose a suitable border color

Use the color control to match the border to your email design. A neutral or brand color usually provides enough separation without distracting from headings, text, or calls to action. Check the contrast against both the table background and the surrounding email background.

Change the table border color

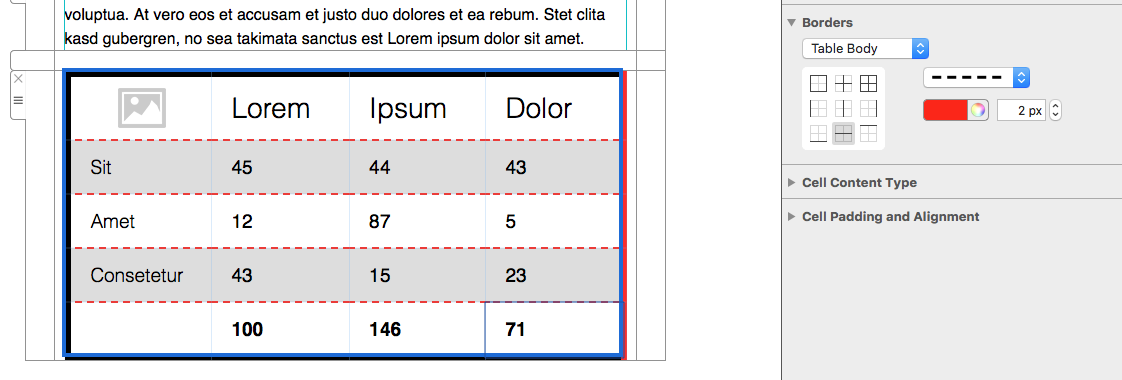
The control panel also lets you apply style changes to a particular part of the table. This is useful when you want a divider between rows or columns instead of a border around every edge.

Apply border styling to a selected table area

Add a border to one table cell

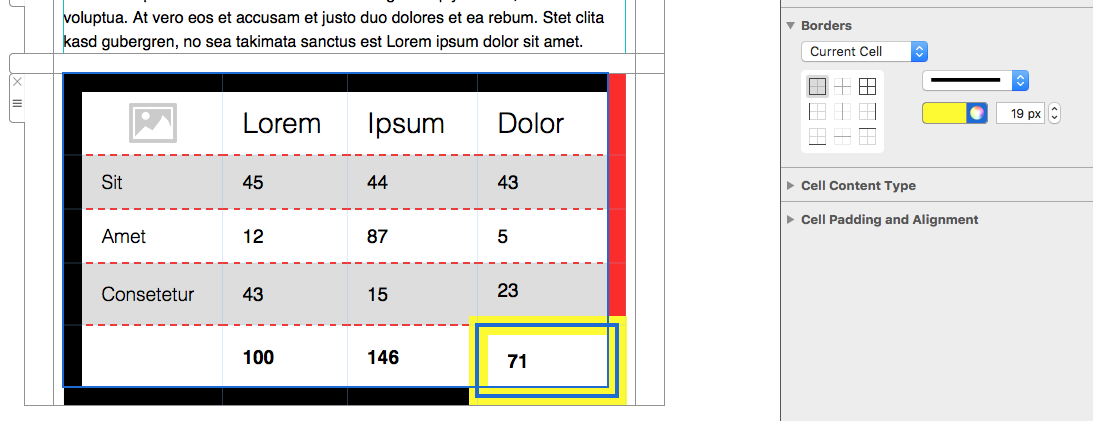
To style only one cell, click that cell and select Current Cell. You can then choose its border style, thickness, and color in the same way as for the full table. This is helpful for highlighting a price, date, total, or other important piece of information without changing the rest of the layout.

Add a border to the current table cell

Review the table before sending

After applying the table border, check that the thickness and color are consistent in every section you intended to change. Preview the email at desktop and mobile widths, and send a test message so you can inspect the table in a real inbox. If one cell looks different, select it again and confirm whether Current Cell or Table Body is active.

Continue with adding content to your tables once the structure and border styling are ready.

Adding content to your tables

By Tables

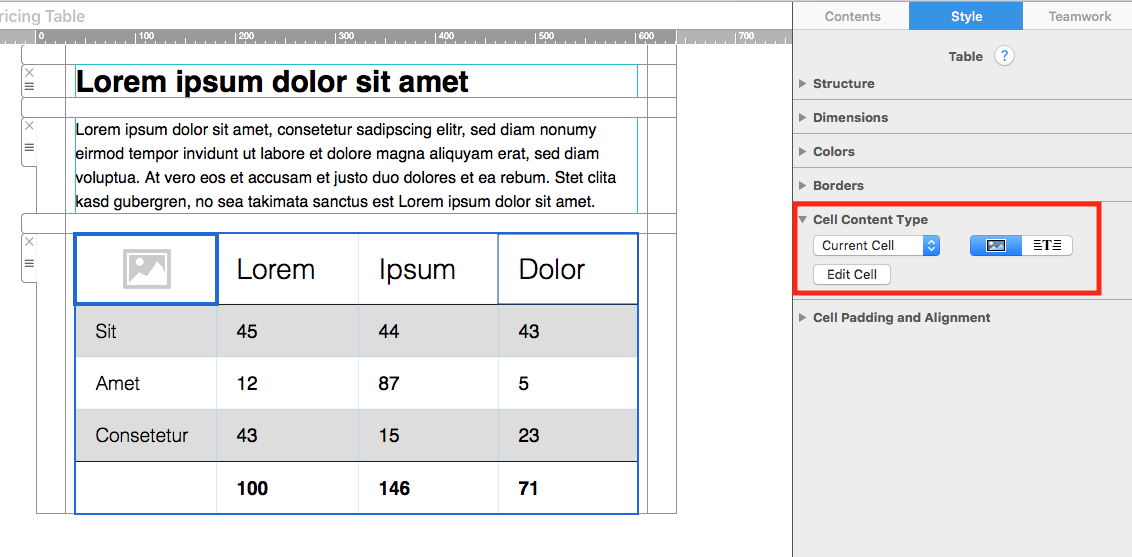
Just like regular Mail Designer 365 layout blocks, table blocks distinguish between raw text and images. You can choose to make your table cells image blocks, text blocks, or a combination of both.

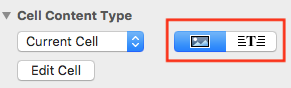
Image block cells are characterised by the image icon. To change the format of a cell from image to text (or vice versa), click on the cell and go to "Cell Content Type."

Here you can change the content type of a cell by clicking on the respective icons. The text and image blocks work exactly the same in tables as they do with regular layout blocks.

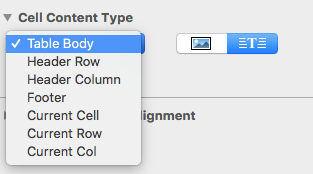
If you want to change the cell content type of an entire row, or the entire table, simply select this from the dropdown list:


Privacy Settings / Datenschutz-Einstellungen