Mail Designer 365 Best Practice Guide

By Hans-Peter A Quick Tour of Mail Designer 365

This Mail Designer 365 best practice guide covers five practical ways to build more reliable HTML email templates. Use these checks for text styles, layout blocks, image links, mobile layouts, and pre-send testing.

Mail Designer 365 Best Practice Guide: Use Text Styles

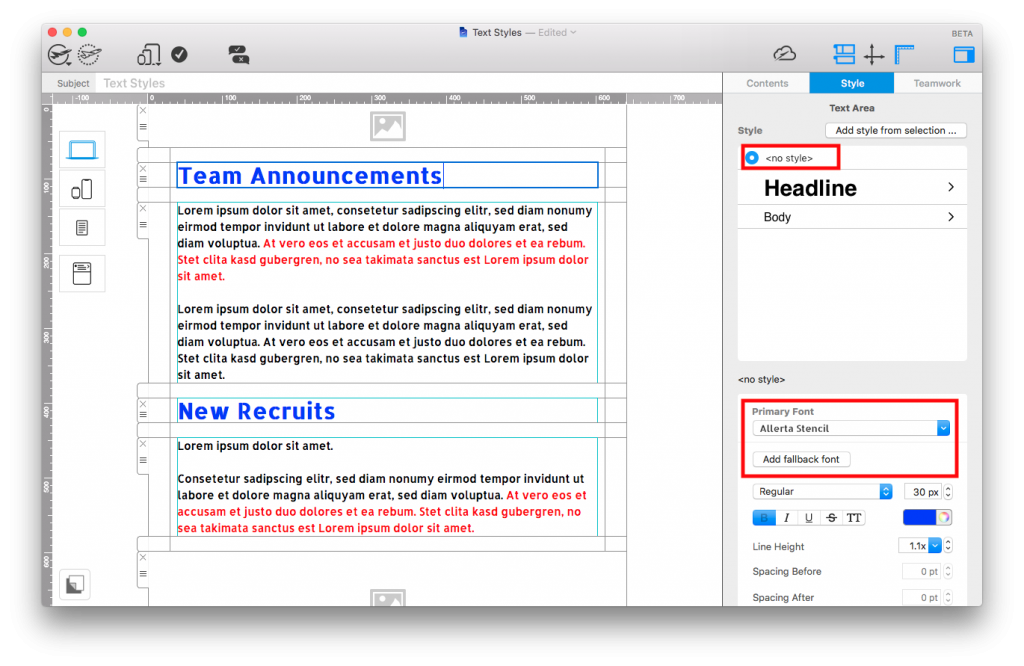
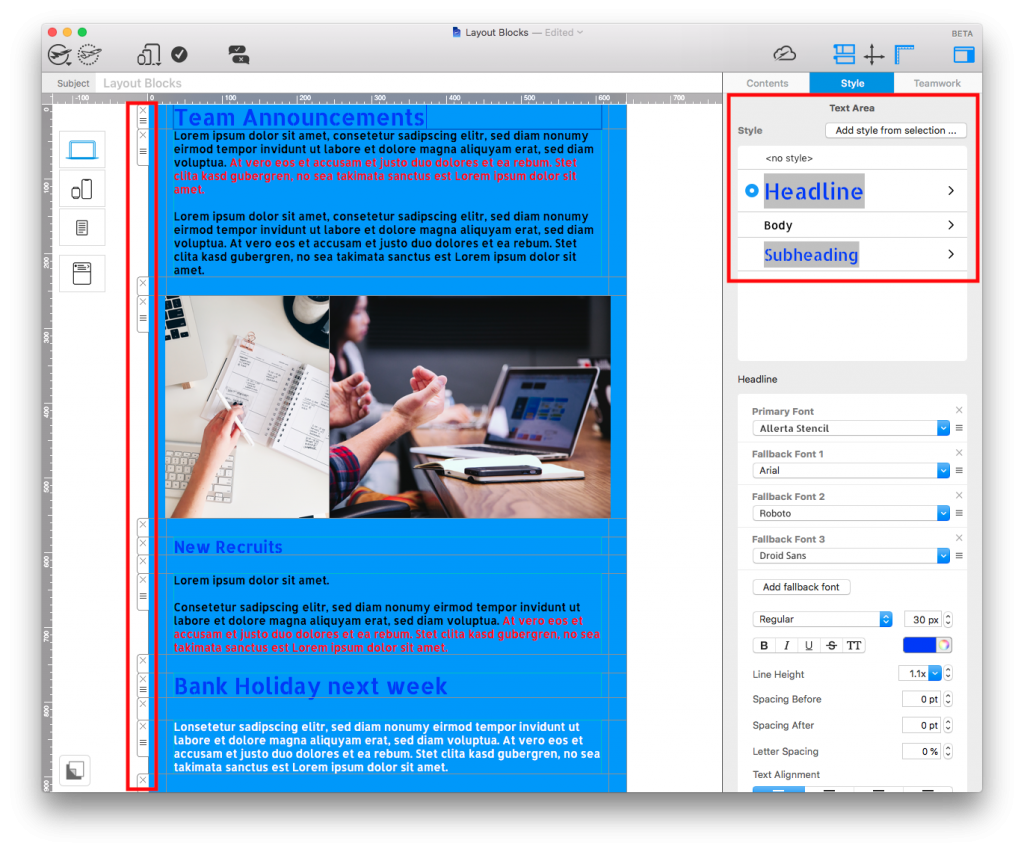
Text styles make your design more reliable when sending, as they are automatically set up with a fallback font. This means your text will be displayed using an email safe font, should there be any compatibility issues with the first font you've chosen.
Mail Designer 365 text style best practice

In this example, there is no text style or no fallback font set up. If the font 'Allerta Stencil' is unavailable, readers will receive an unformatted message.

You can learn more about setting up text styles here.

It is also a good idea to set up text styles, as they help you to keep all text consistent throughout your design. Without a style, editing newsletter text is more difficult, as you will have to apply changes to every section of your design manually.

2. Use text layout blocks for email copy

Use the designated text layout blocks for any email copy, as you may run into compatibility issues otherwise. Email designs which are purely made up of images often encounter problems after sending.

What could go wrong?

  • Some email providers block images in emails by default. Your all-image email will appear blank and readers will miss your message.
  • Using only images also increases the size your email; making it much slower to load.
  • Spam filters can detect and trap image-only emails as a precaution.
Email layout built only from image blocks

This email consists solely of image elements. Although it's hard to see a problem while editing inside Mail Designer, after sending, you could run into compatibility issues.

Decorative text like buttons and eye-catchers are ok to go in an image area. Any copy which is important to the message of your email should be displayed in a text block.
This design looks almost the same as the first, but is much better practice. Text is contained in text blocks and images in image areas.

3. One link per image block

Unlike text blocks, where you can include as many different text links as you like, you can only use one link per image block. This is because the link attaches itself to the entire area of the block, rather than the individual design element you are referring to.
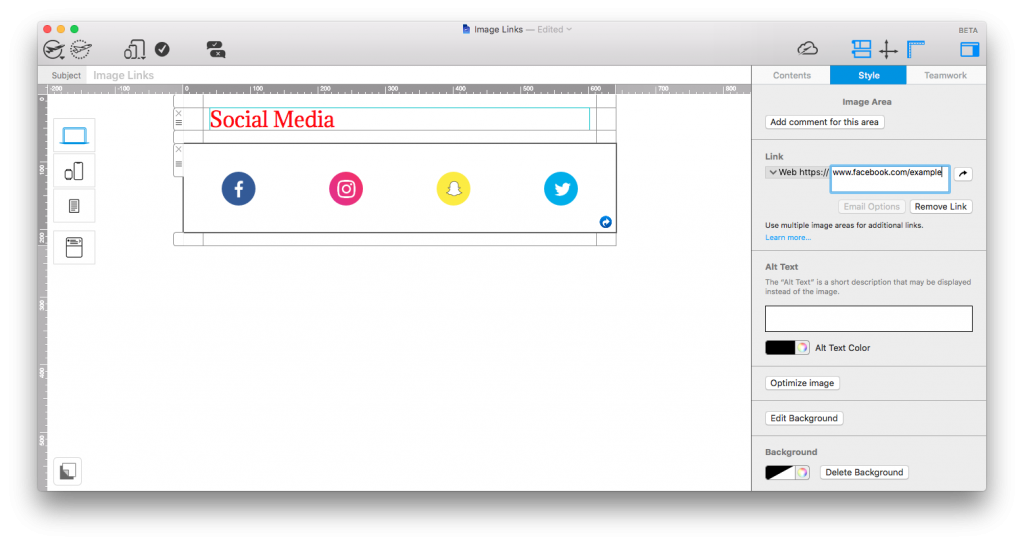
In this example, 4 buttons have been placed in one image block. Only one link will work per image area.

To link two or more images (e.g. social media buttons, product catalogue listings, etc.), you will need to use a multi-image layout block as a workaround. Each design element needs to be linked inside its own image area in order for the links to work correctly.
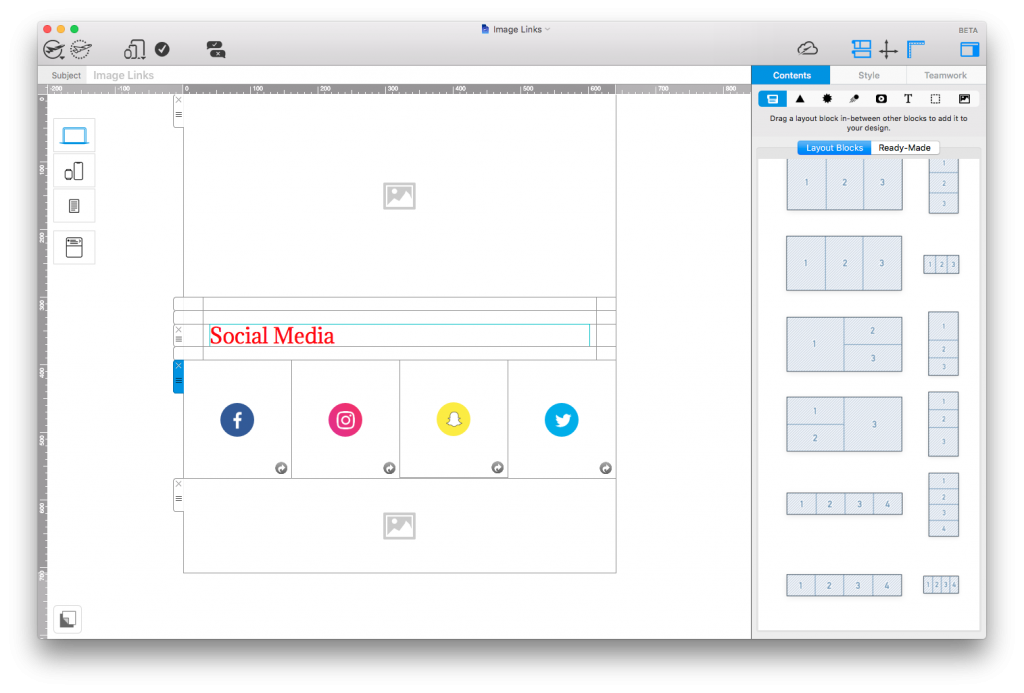
Use a multi-image layout block if you want to add additional links.

You can find more information on how to insert multiple image links here.

4. Think about your mobile version

You can customise content in the smartphone view to make it more suitable for mobile users. This is done by detaching the respective layout blocks to separate them from the main design (see this tutorial.)

We would advise against detaching all of your mobile blocks from the main layout. Not only does it create a much larger file size (you essentially have two email designs in one), it also means that any changes you make to the content of your email will have to be made twice.
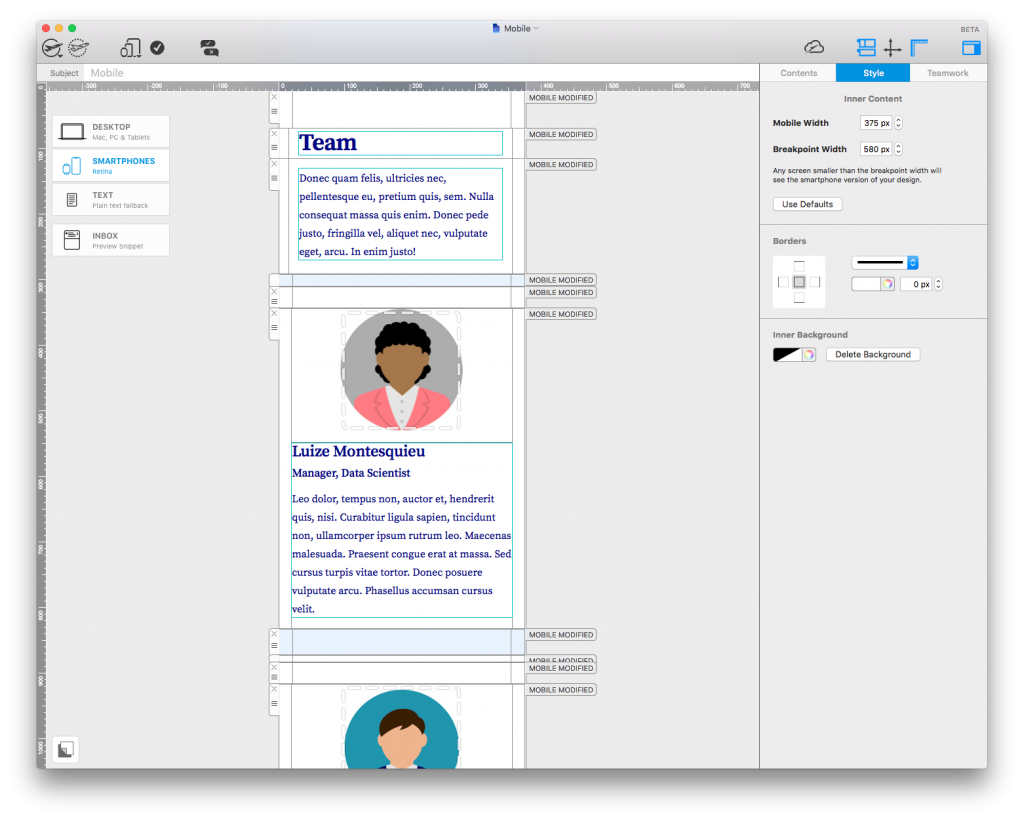
Detaching all of your mobile blocks from your main layout as shown here will increase the size of your design file and make editing more difficult.

5. Don't change your design following export

As we have no means of testing external or custom code, our team cannot guarantee that changes made outside of Mail Designer 365 app will be compatible.

It is best practice to carry out any changes inside the app and re-export new versions until you have settled on your final design.
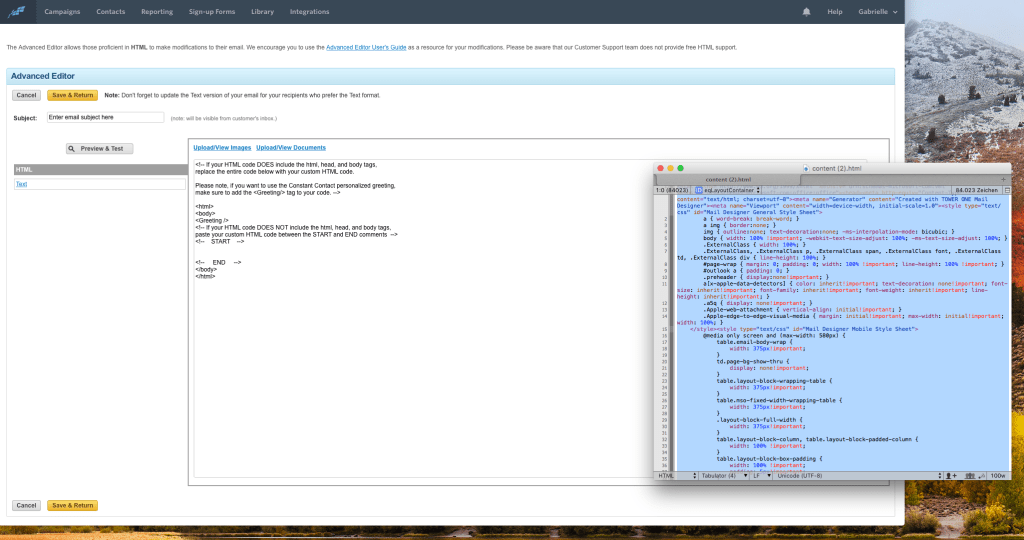
When you are copying your exported code into your ESP's editor, don't change any aspects of it. We cannot guarantee your design will look the same as you intended it to if you change it.

How to use the search and sort features in Mail Designer 365

By A Quick Tour of Mail Designer 365

With Mail Designer 365 you can use the search and sort option to organize your designs to your preference and also search for designs when you're in a hurry. Here's how...

How to quickly find a design

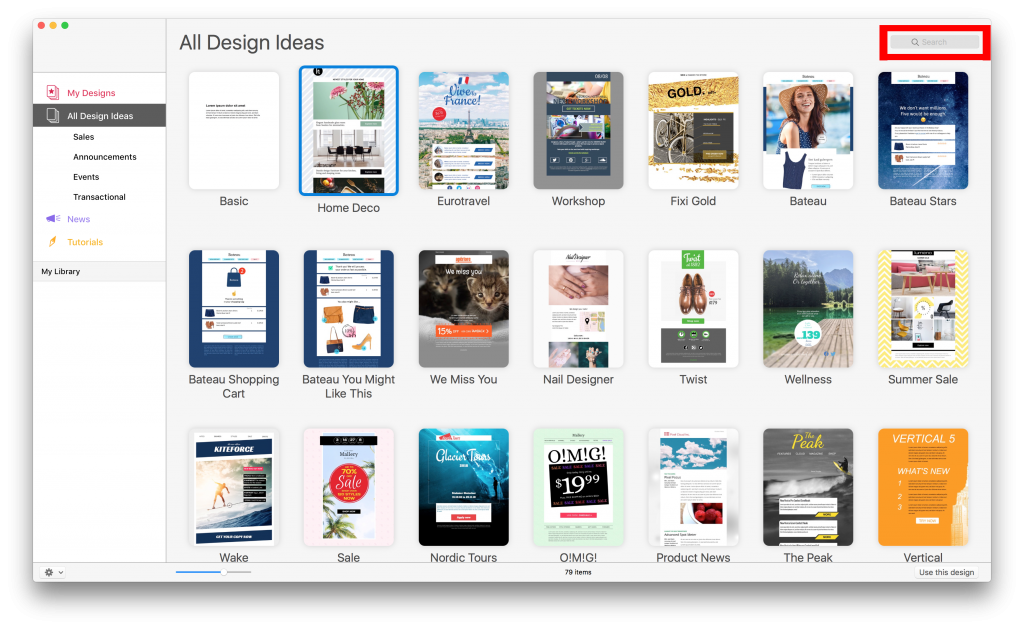
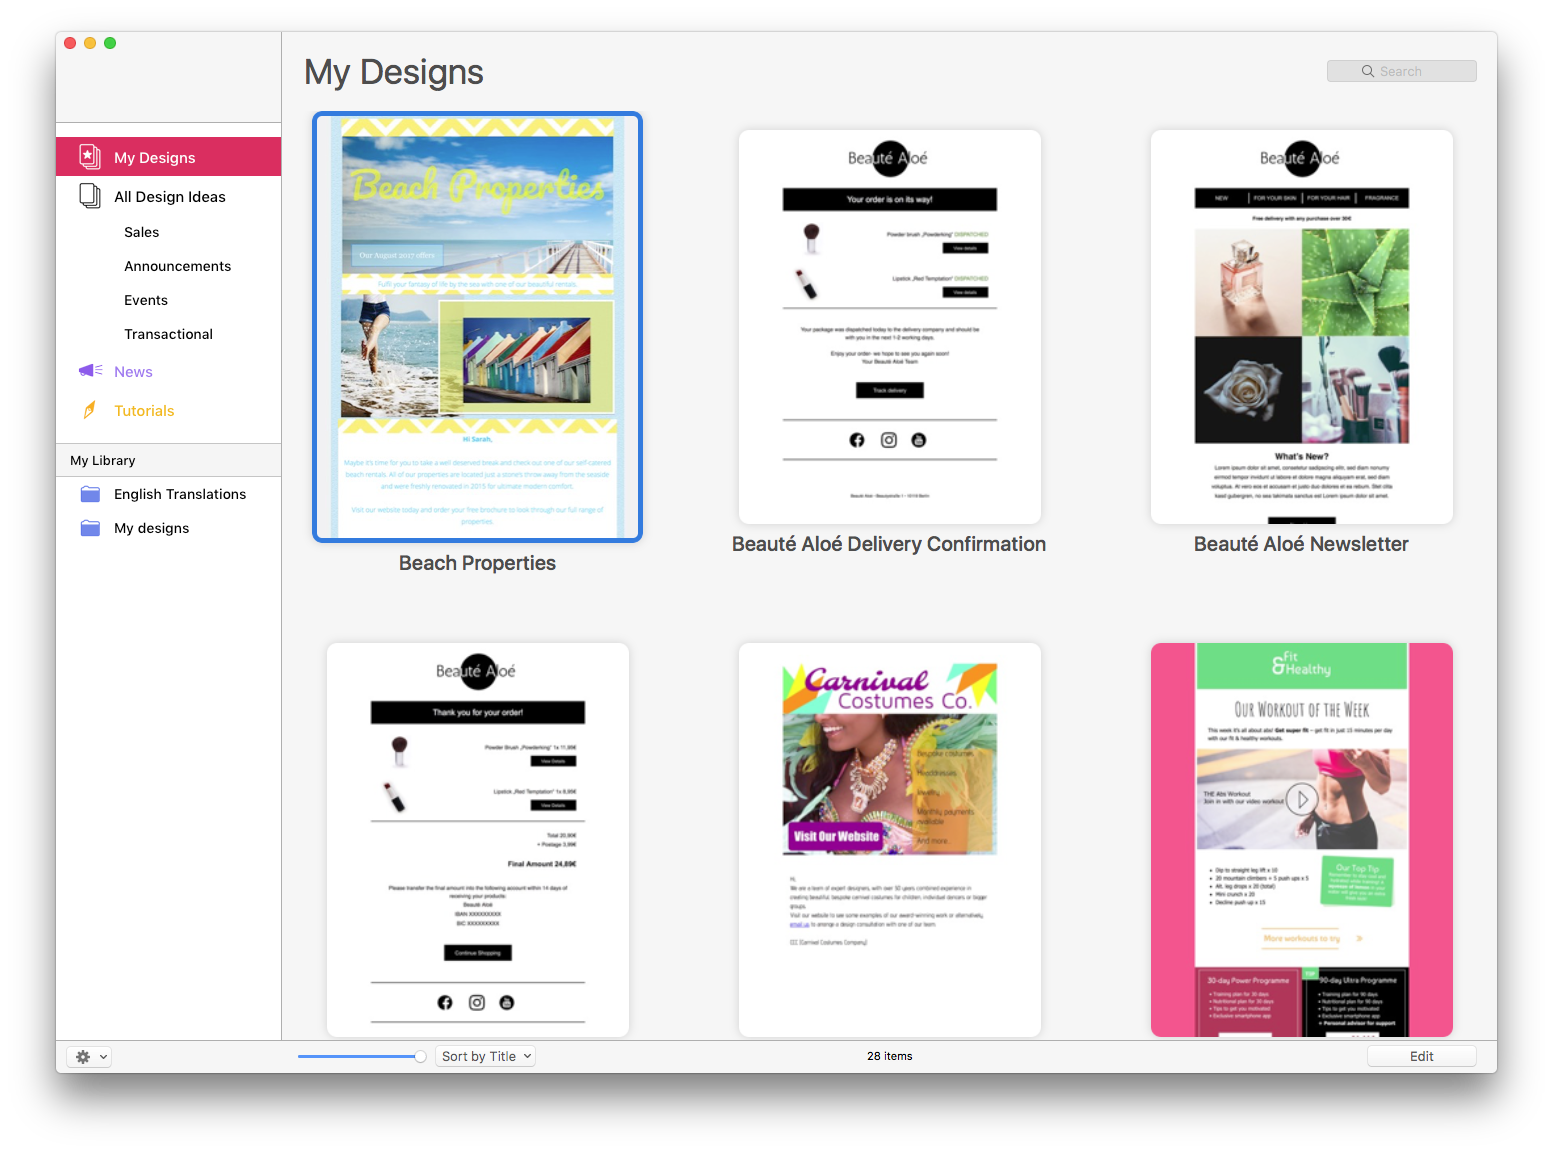
In the top right-hand corner of the design chooser you can find a search box:

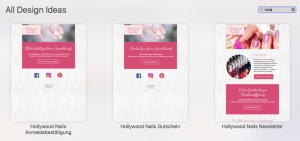
Use this search box to quickly search a design by name:

How to sort your designs

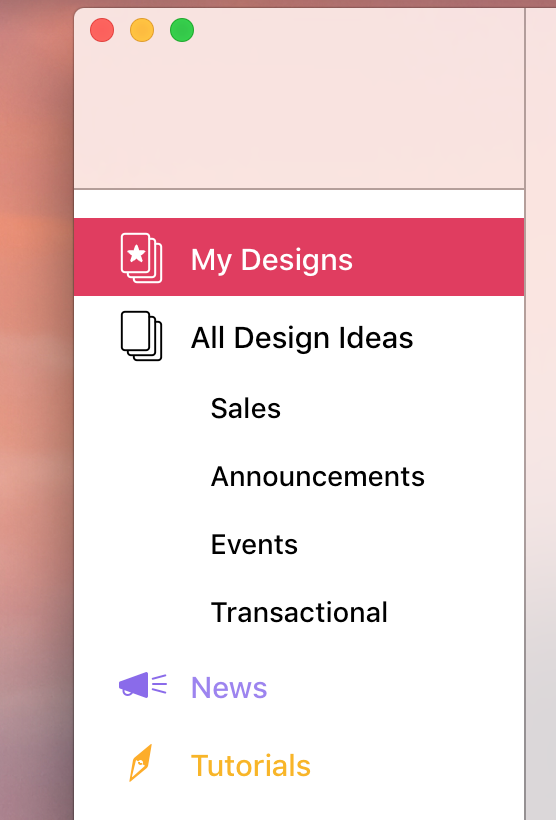
Make sure that you are on the "My Designs" section of your Mail designer 365 window. The sort feature is not available in the "All Design Ideas" section.

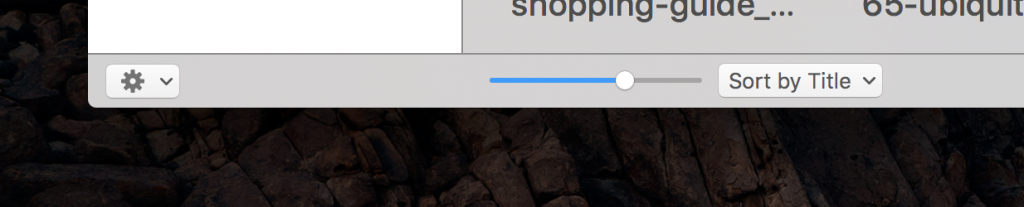
In the bottom bar of the "My Designs" section of the design chooser you can find the sort menu:

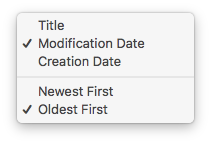
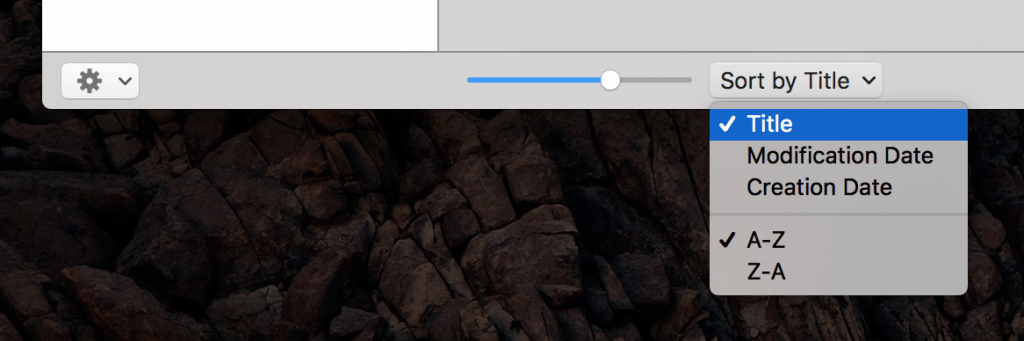
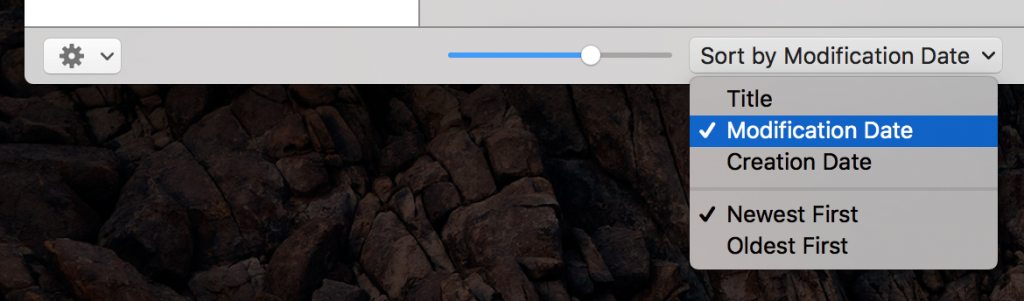
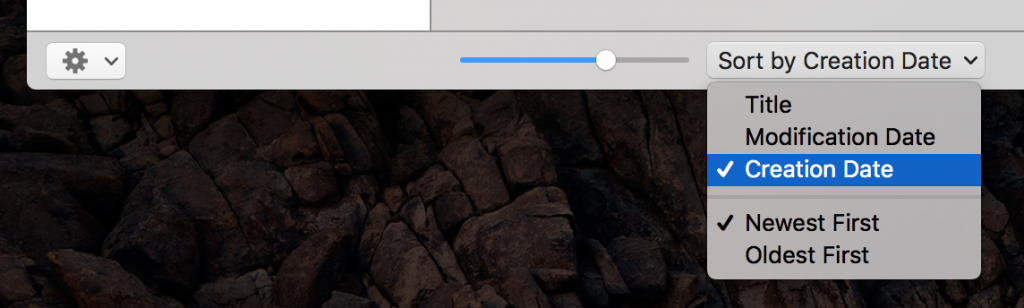
Click on an option to sort your designs to your personal preference. For example, you can choose to sort your designs from the following options:

If you click on an option, your sort preference will be applied to your designs and automatically remembered by Mail Designer 365. For example, here designs have been sorted alphabetically (Title A-Z.)


Change the Language Settings of Mail Designer 365

By Hans-Peter A Quick Tour of Mail Designer 365

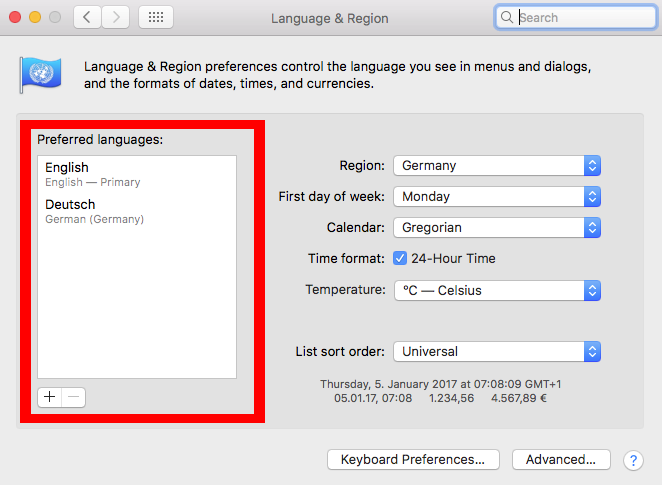
The language settings of Mail Designer 365 follow the language configuration on your Mac. To change the interface language, update the preferred language in macOS, quit Mail Designer 365 completely, and reopen the app. The screenshots below show the older System Preferences interface; newer macOS versions call this area System Settings.

Open Language & Region on your Mac

Open System Settings or System Preferences, depending on your macOS version. These controls manage the preferred languages available to apps on the Mac.

Opening macOS settings to change the Mail Designer 365 language

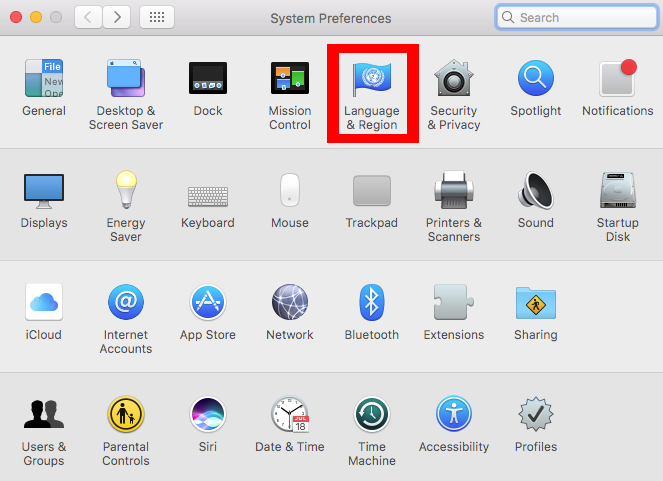
Choose Language & Region. If the layout on your Mac differs from the screenshot, use the search field in System Settings to find Language & Region directly.

Language and Region settings in macOS

Add the preferred language

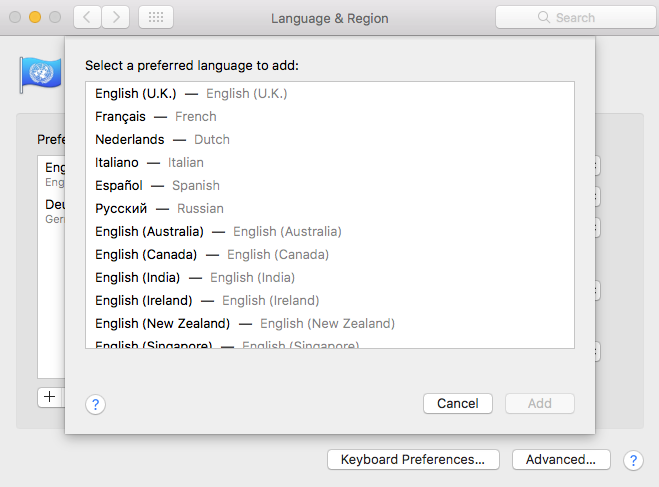
Use the plus button to add the language you want to use. macOS displays a list of available system languages; select the preferred entry and continue with Add.

Please note: Mail Designer 365 is currently only available in English, German and Chinese. Selecting another macOS language does not create an additional Mail Designer 365 translation.

Adding a preferred language in the macOS language settings

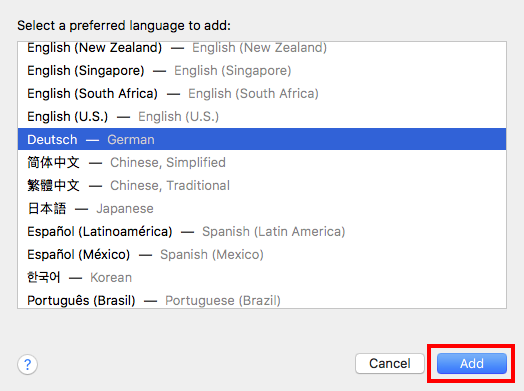
Confirm the selection by clicking Add. If macOS asks whether the new language should become the primary language, choose the option that matches how broadly you want the change to apply.

Confirming a newly selected macOS language

Set the preferred language order

In the older System Preferences interface, drag the preferred language to the top of the list. The language order tells compatible apps which localization to use first. On newer macOS versions, follow the equivalent preferred-language controls shown in Language & Region.

Moving a preferred language to the top of the macOS list

Changing the language settings of Mail Designer 365 may also affect the language used by other compatible apps when you change the Mac-wide preference. Review the macOS confirmation before applying a system-wide language change.

Quit and reopen Mail Designer 365

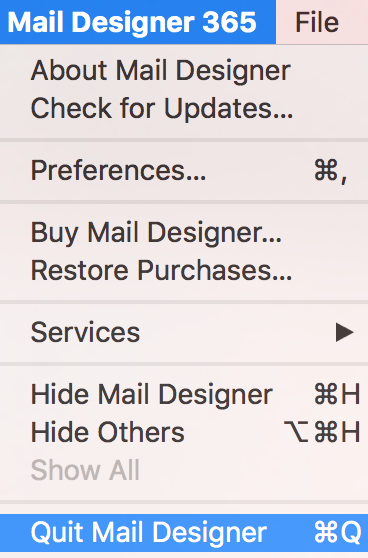
Mail Designer 365 must restart before it can use the updated language preference. Choose Mail Designer 365 > Quit Mail Designer from the menu. Do not only close the design window, because the application may remain open in the background.

Quitting Mail Designer 365 before applying a language change

Reopen Mail Designer 365 and check the menus and main interface. The app should now use the first supported language from the macOS preference order.

If the Mail Designer 365 language does not change

First confirm that Mail Designer 365 was fully quit and reopened. Then return to Language & Region and verify the preferred-language order. If the selected language is not supported by the installed app version, Mail Designer 365 uses another supported language from the list.

If the interface still shows the previous language, restart the Mac after saving your work and check again. Avoid changing document content or recreating a design to solve an interface-language issue; the setting applies to the application, not to the text inside an email design.

Before changing the application language

Save the open email design before changing the macOS language order or quitting the app. The interface-language setting does not translate the text, links, subject line, or other campaign content you created. Those parts of the email remain exactly as written and must be localized separately when you prepare a campaign for another audience.

If several people collaborate on the same design, tell them that screenshots or menu names may appear in another language on your Mac. This helps avoid confusion when following instructions together. The design file remains compatible; only the surrounding Mail Designer 365 interface labels change.

Confirm the result after reopening

After Mail Designer 365 restarts, check a few familiar menus and controls to confirm that the expected supported language is active. Open the existing design and make sure its content, images, and links are unchanged. If you only needed the alternate interface temporarily, restore the previous macOS language order, quit the app again, and reopen it.

These checks make changing the language settings of Mail Designer 365 predictable without altering the campaign itself.

How to Enable Mail Designer 365 Beta Versions

By Hans-Peter A Quick Tour of Mail Designer 365

What is a beta version?

Beta versions are versions that are available for testing. Please note: These are not the final versions that will be released to the public. However, many people may want to try a beta version. It gives them a chance to check out some of the more current changes and improvements to the software. People can also report bugs, glitches, and other flaws to the developers. This is helpful because issues can then be addressed before the public release of an official version.

How to enable Mail Designer 365 beta versions

To enable Mail Designer 365 beta versions, join the Mail Designer beta program through the app's update settings. This early-access option is available when you bought Mail Designer 365 from our website. Please note: The Insider Program is not available for the Apple Mac App Store version.

Become a Mail Designer 365 Insider...

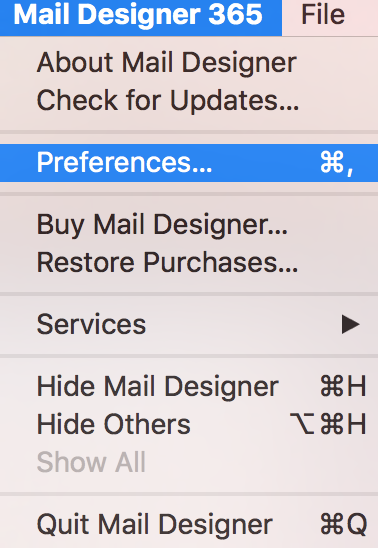
Open Mail Designer 365 on your Mac. Choose "Mail Designer 365" > "Settings" from the top menu bar.

Mail Designer 365 Settings menu for beta updates

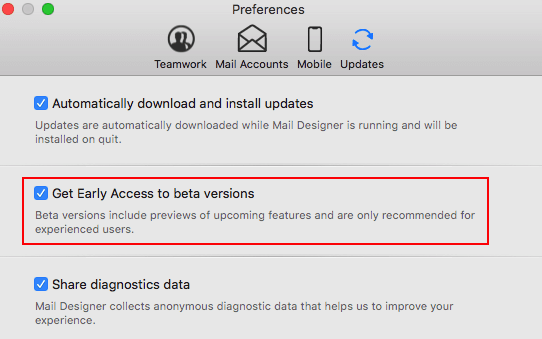
Open the "Updates" section and enable the option to load beta versions.

Enable beta versions in Mail Designer 365 Updates settings

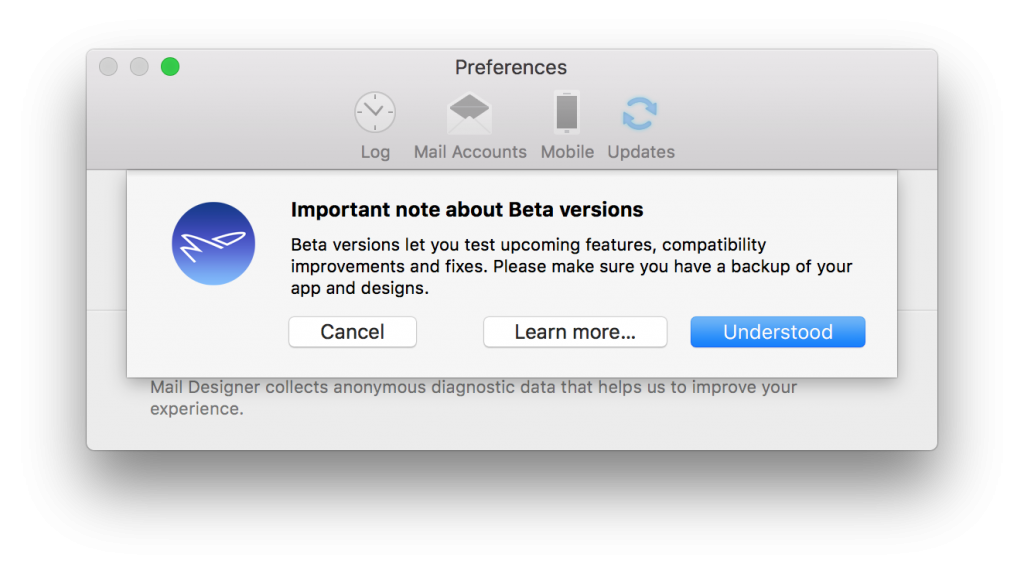
Since Beta versions are meant to test features and compatibility, Mail Designer 365 will remind you to have a backup of your app and designs.

Backup reminder before installing a Mail Designer beta version

Click "Understood" whenever you are ready. Once you've restarted the app, you will be able to see whether you are using a Beta version by the label in the top right corner of the app window:

Beta version label in Mail Designer 365

Updates...

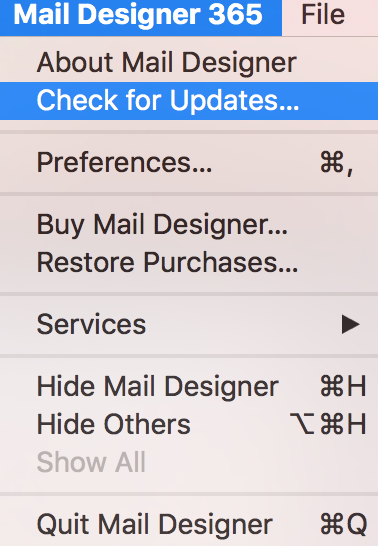
When it comes to checking for updates, Mail Designer 365 will check for new versions on app start. Also, you can choose "Mail Designer 365" >" Check for Updates…" from the top menu bar.

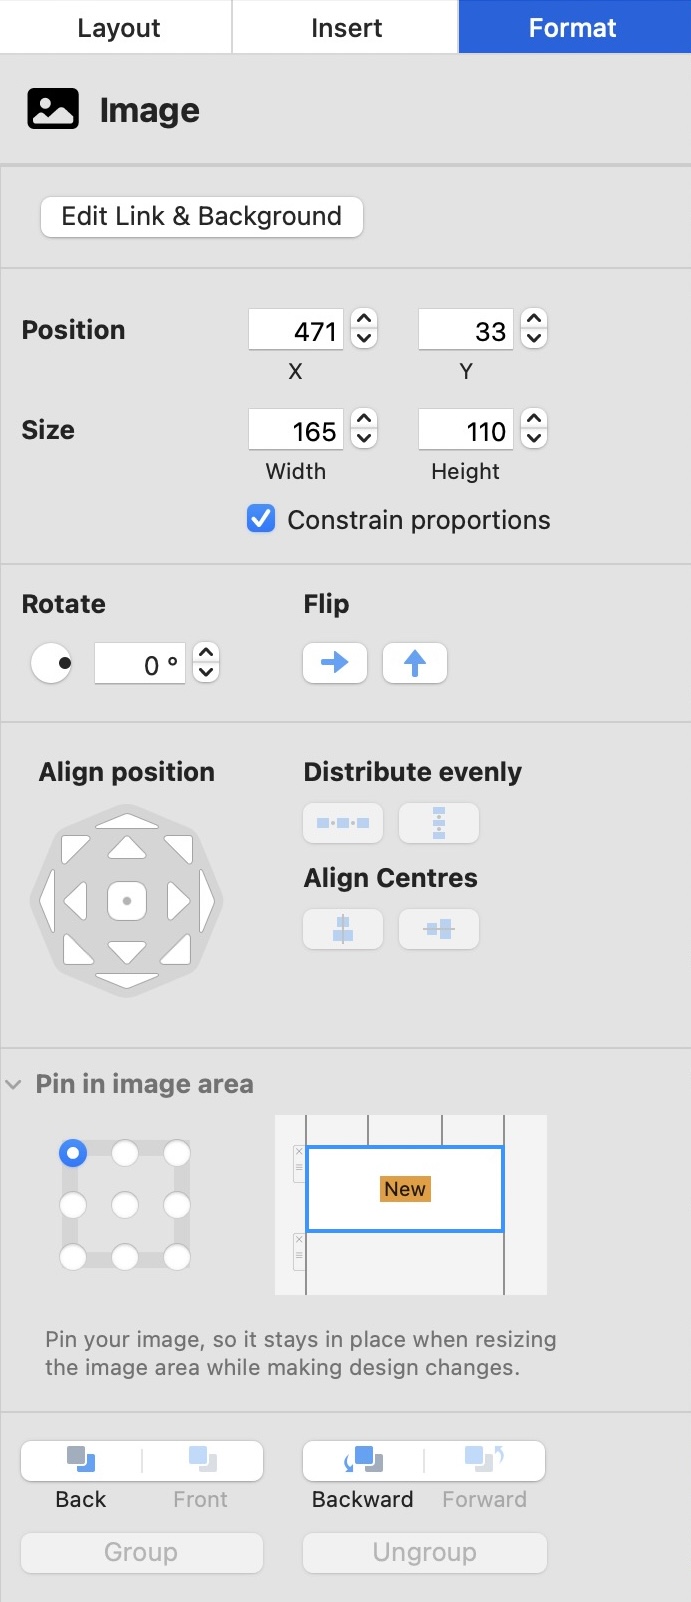
An "Image" format panel in Mail Designer 365, displaying controls for position, size, rotation, flip, and alignment. Under "Align position," a visual grid shows various alignment options, including the prominent "Align Centres" option for centre alignment, left alignment, right alignment, top alignment and bottom alignement, along with horizontal and vertical distribution tools.

Alignment Shortcut Key Guide for Mail Designer 365

By Team equinux A Quick Tour of Mail Designer 365

Mail Designer 365 offers a wide range of keyboard shortcuts to help you align elements precisely and save time while designing. In this guide, you’ll learn every alignment shortcut key available in the app — from aligning text and images to the left, right, center, or middle — all using simple keyboard combinations on your Mac.

Alignment Tools in the “Format” Tab

In the Style tab, you’ll find intuitive alignment options under the Align Position and Align Centers sections:

  • Align Position Buttons
    These buttons snap the selected element to the top, middle, bottom, left, center, or right of the layout area or container.
  • Align Centers
    Use this to center elements vertically or horizontally relative to each other.
  • Distribute Evenly
    Automatically spaces out multiple selected elements evenly across the layout, either horizontally or vertically.

These tools are especially useful when working with multiple images, text boxes, or buttons in one layout.


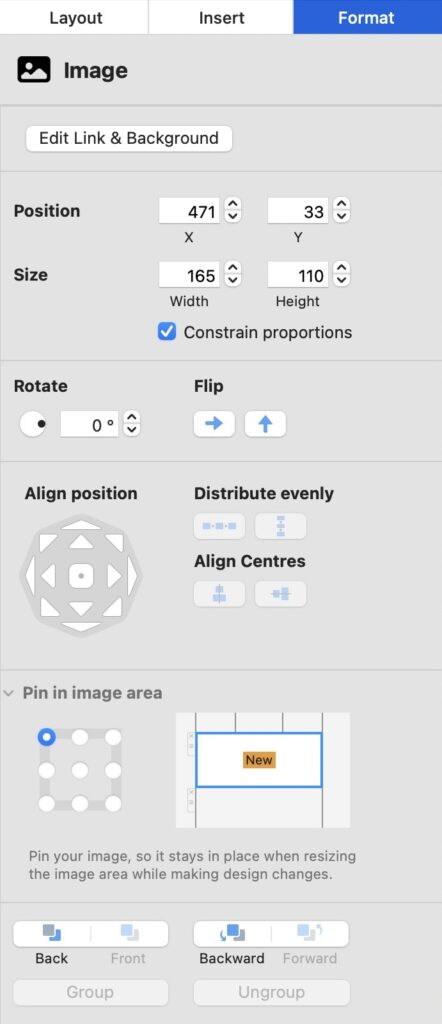
An "Image" format panel in Mail Designer 365, displaying controls for position, size, rotation, flip, and alignment. Under "Align position," a visual grid shows various alignment options, including the prominent "Align Centres" option for centre alignment, left alignment, right alignment, top alignment and bottom alignement, along with horizontal and vertical distribution tools.

Full List of Alignment Shortcut Keys in Mail Designer 365

For even faster editing, use the following keyboard shortcuts to align selected elements:

You can use an alignment shortcut key to instantly align objects in your design workspace. Whether you’re aligning to the left, center, right, top, or bottom, these shortcuts will help you work faster and more efficiently.

Action Shortcut Instruction
Align Left ⌃ + ⇧ + L Control + Shift + L
Align Center (Horizontal) ⌃ + ⇧ + C Control + Shift + C
Align Right ⌃ + ⇧ + R Control + Shift + R
Align Top ⌃ + ⇧ + T Control + Shift + T
Align Middle (Vertical) ⌃ + ⇧ + M Control + Shift + M
Align Bottom ⌃ + ⇧ + B Control + Shift + B

Tip: Hold down Shift + Control and press the corresponding key to align your element without using the mouse.

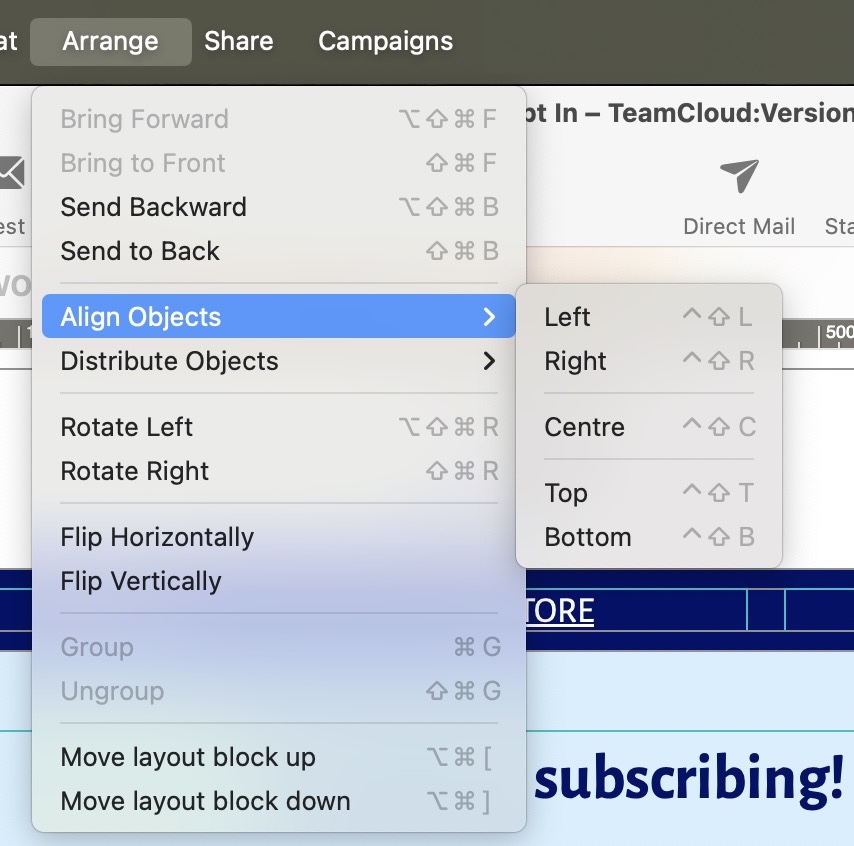
You can of course also always find these shortcuts in the menu under Arrange > Align objects > And then choose your preferred alignment option:

An "Arrange" menu in Mail Designer 365, showing alignment shortcut key for object arrangement. The "Align Objects" submenu is expanded, revealing options for Left, Right, Centre, Top, and Bottom alignment, with "Centre" highlighted.

Pin in Area (Bonus Tip)

Use the “Pin in area” section in the Style tab to lock an element to a specific part of its container. This helps maintain layout consistency when resizing content blocks or working with responsive layouts.


Mail Designer 365 keyboard shortcuts overview

Appendix: Keyboard shortcuts

By Team equinux A Quick Tour of Mail Designer 365

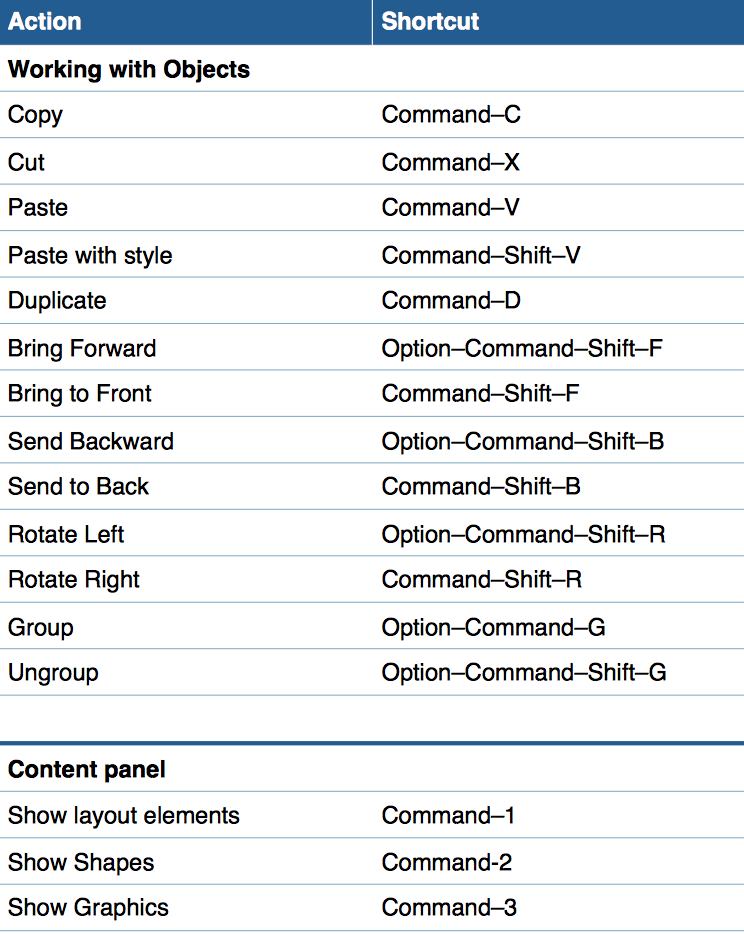
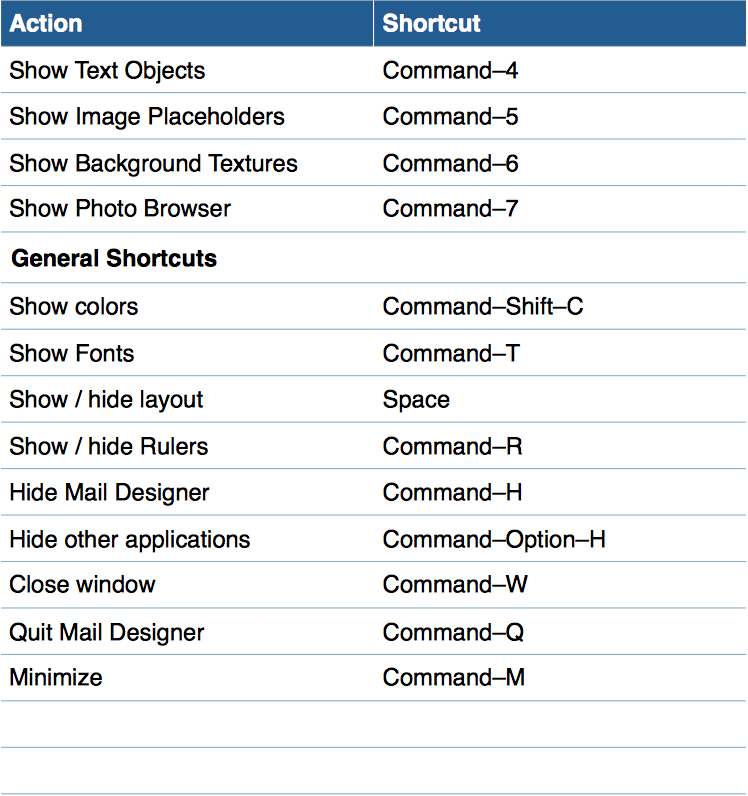
Keyboard Shortcuts

Here you will find keyboard shortcuts that you can use in Mail Designer 365:


Email Client Compatibility Tips for HTML Email

By Team equinux A Quick Tour of Mail Designer 365

Use these email client compatibility tips to create HTML emails that remain readable across common inboxes. Mail Designer 365 helps you build a clear layout, but backgrounds, sidebars, fonts, and browser-view links still need careful testing.

Email Client Compatibility Tips: Backgrounds

Certain email programs (notably Outlook 2007 and 2010) have issues displaying several layers of backgrounds. To maximize compatibility, assume that your primary background color will show up. Make sure the font colors you choose will work with that color.

Sidebars

A sidebar layout item may not always display as intended. This is particularly true if it has a separate background color. Instead, you may want to place sidebar details in a regular layout element. This will help improve compatibility.

Choosing Fonts

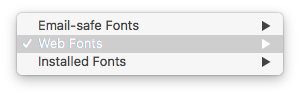
We highly recommend that you stick to the "web-safe" fonts. When choosing a font within a layout block, web-safe fonts are shown in Mail Designer 365 by default. If you choose another font, then it may not display on your recipient's computer as intended.

email client compatibility tips for choosing web-safe fonts

Include a compatibility link

Export your newsletter as a HTML web page. You can include a link to it in your email, allowing readers with older email clients to read your newsletter in their browser as you intended it to be displayed.

Click File > Export as HTML.

export an HTML email compatibility link

Test your HTML email before sending

Preview the complete message on desktop and mobile, then send proofs to the inboxes your audience uses most. Check text contrast, image alternative text, link destinations, fallback background colors, and the browser-view version. These email client compatibility tips reduce surprises while keeping the message useful when images or advanced styling are unavailable.

For accessible wording and link text, review the W3C writing guidance. You can also explore more Mail Designer 365 email templates before adapting your layout.

Creating a new design

By Hans-Peter A Quick Tour of Mail Designer 365

Design Ideas - Inspiration for beautiful emails

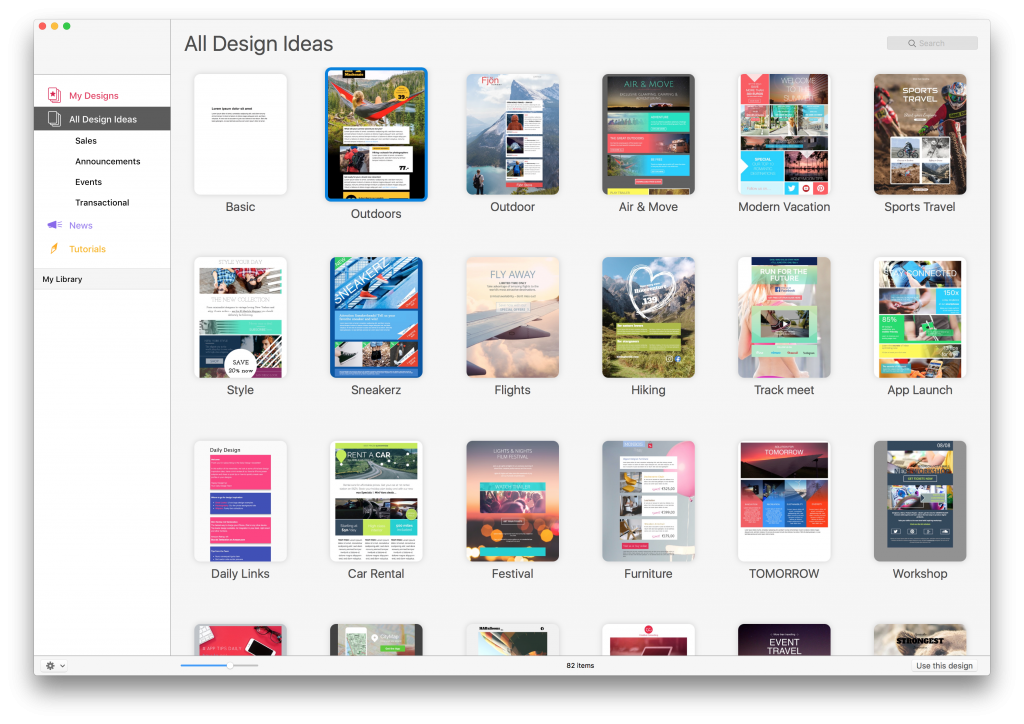
Mail Designer 365 includes several “Design Ideas.” These are common email layouts you can use as a starting point for a new email design.

Choose from the wide selection of templates. Or you can start with a template from templates purchased In-App. Just double-click a design in the chooser window to create a new design based on that Design Idea.

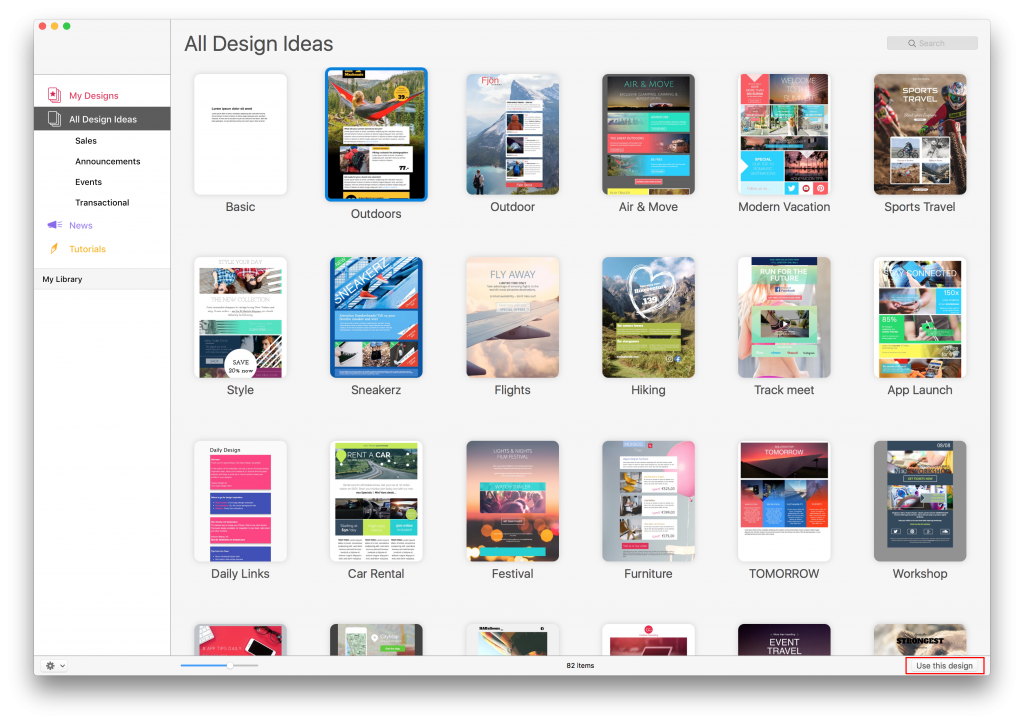
You can also click on the "Use this design" button on the bottom right:

The design will open in a new window - ready for you to start editing!


The Style section

By A Quick Tour of Mail Designer 365

Style options

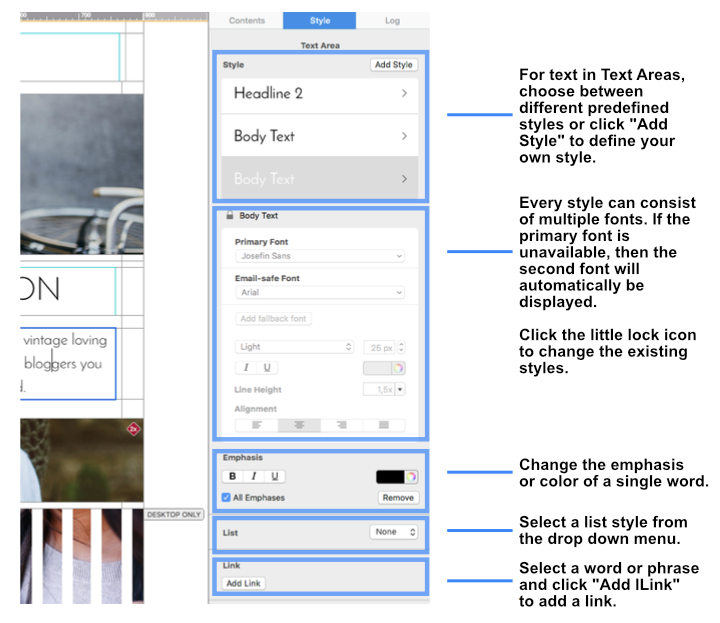
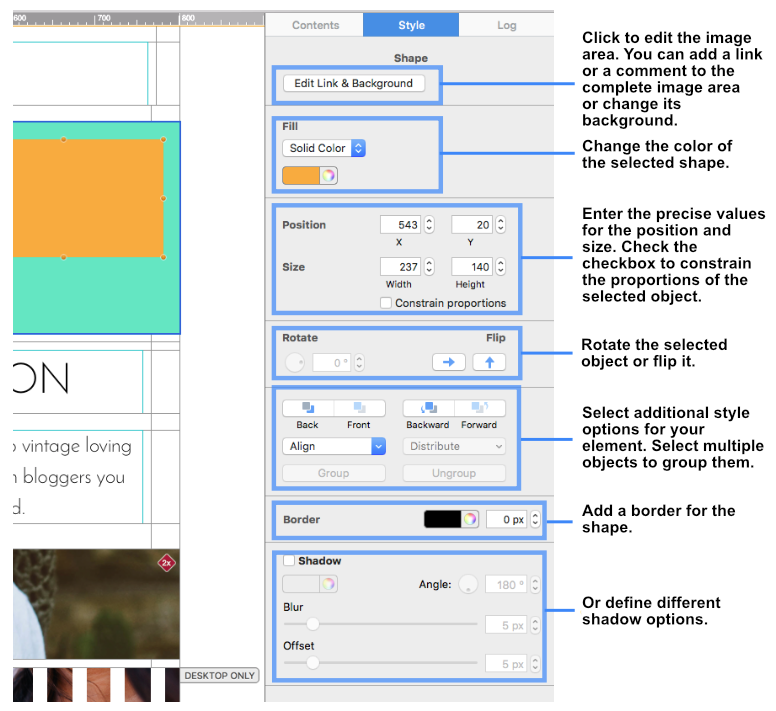
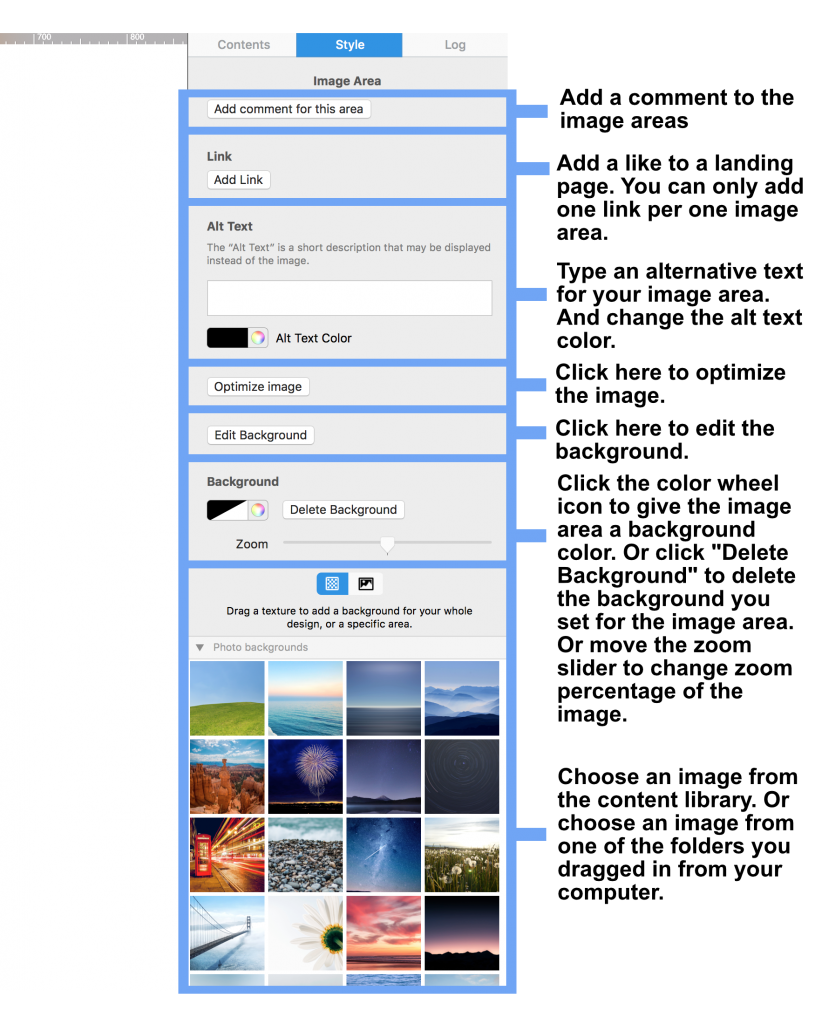
The "Style" section in Mail Designer 365 allows you to format text or objects within an image area from one central place. Depending on the element you have selected, you will see the corresponding style options in the sidebar.

Text Area: Style, Body Text, Emphasis, List, Link

Shape: Link & Background, Fill, Position, Size, Rotate, Flip, Align, Group, Border, Shadow

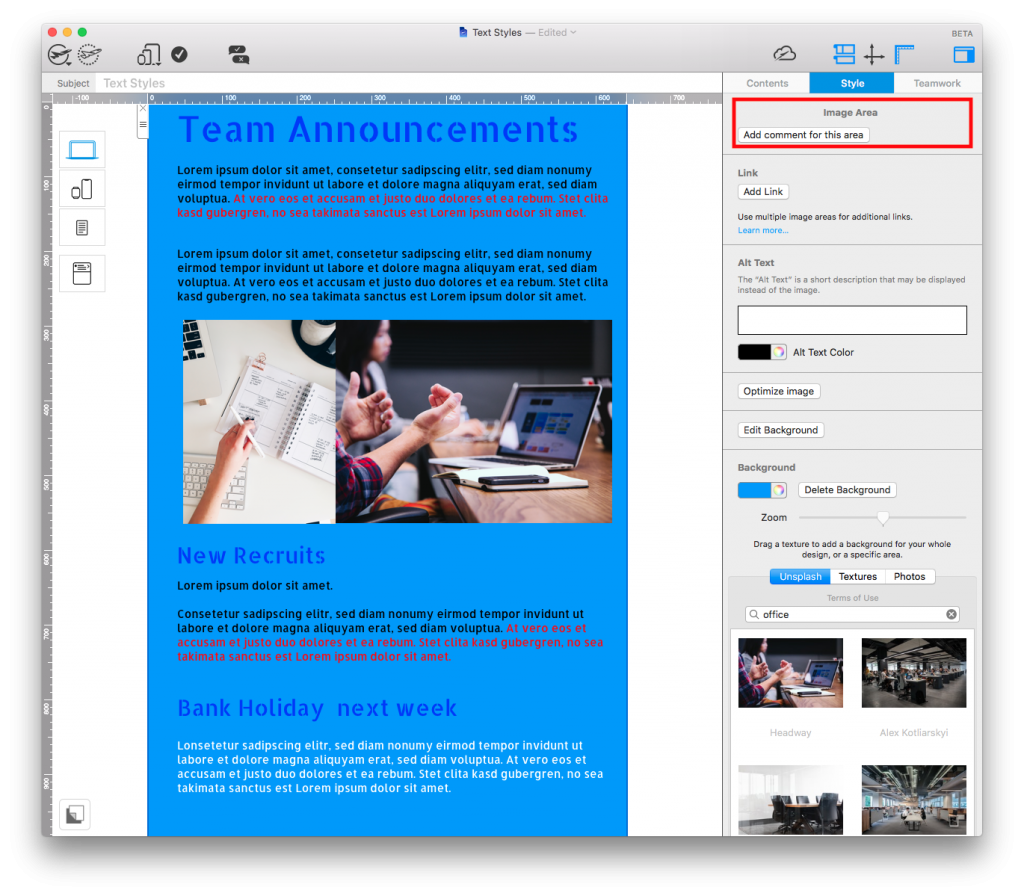
Image Area: Comment, Link, Alt Text, Optimize, Edit Background, Delete & Zoom, Library


Privacy Settings / Datenschutz-Einstellungen