
How to Optimize an Image Area
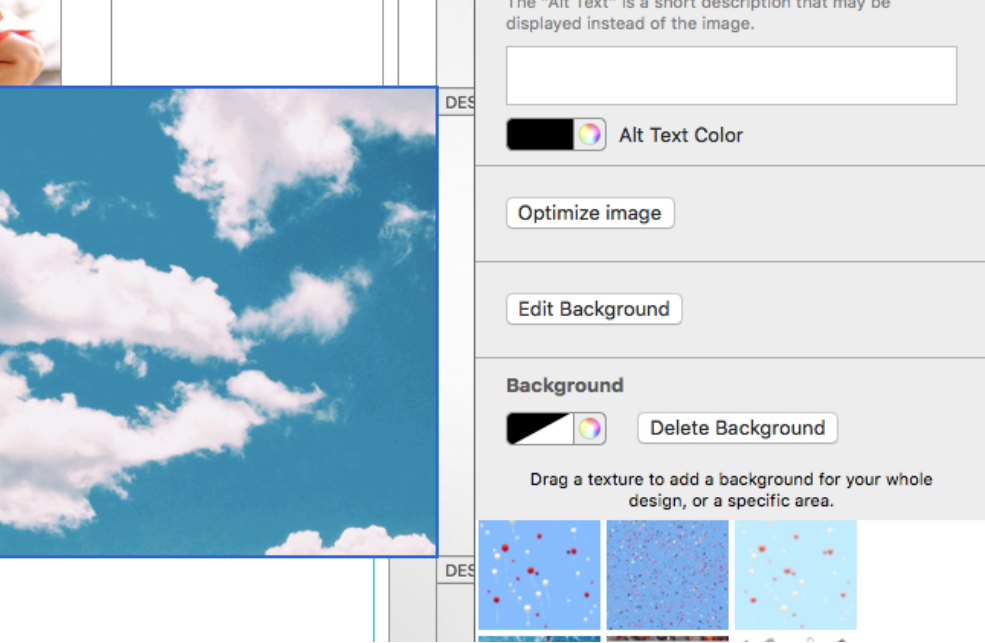
To optimize an image area in Mail Designer 365, select the image area and choose Optimize Image in the Style section. The optimization dialog lets you save the area as JPEG and balance visual quality against file size before you send the email.
Email image compression matters because every image contributes to the amount of data a recipient must download. A smaller design can load faster on mobile connections, while an unnecessarily high compression level can create visible artifacts around text, logos, and sharp edges. Use the preview and estimated size together rather than choosing the smallest file automatically.
Select the Image Area
Click the image area you want to adjust. Confirm that you selected the area itself rather than a separate graphic or text object placed on top of it. In the Style controls, click Optimize Image to open the format and quality settings.
Choose JPEG and Compression Quality
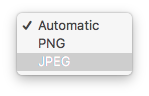
Select JPEG when the image area contains a photograph, gradient, or other continuous-tone artwork. JPEG compression can reduce file size substantially, but it does not preserve transparency and may introduce artifacts at aggressive settings.

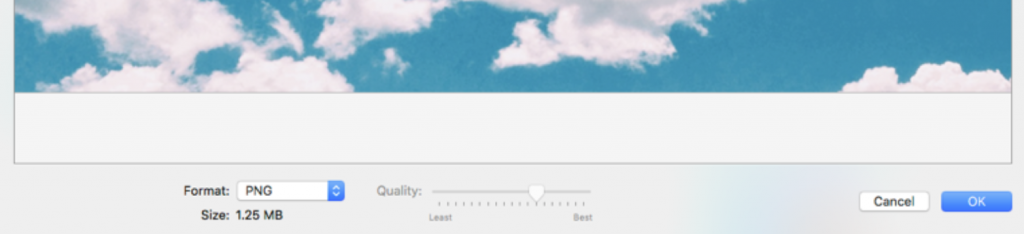
Drag the quality slider and watch the estimated image size change. Start with a moderate setting, then inspect detailed parts of the image. Faces, product edges, small type embedded in artwork, and high-contrast transitions usually reveal compression problems first.
Balance Image Quality and Email Size
A higher quality setting keeps more detail but produces a larger email asset. A lower setting reduces download size but can make the image look soft or blocky. Choose the lowest compression quality that still looks clean at the size recipients will actually see.
Do not rely only on the editor’s zoomed view. Check the desktop and smartphone versions, especially when the mobile layout uses a different crop. Retina displays can expose quality problems that are easy to miss at a reduced preview size. When the artwork contains a logo, icon, or text with transparency, consider whether the original asset format is more suitable than JPEG.
Apply and Review the Optimization
Click OK to save the selected quality setting. Reopen the optimization control if the result looks too soft or if the estimated size remains unnecessarily high.


Preview the complete email after optimizing the image area. Check that important content remains legible, the crop has not changed unexpectedly, and the surrounding layout still looks correct. Then send a test email to at least one desktop and one mobile inbox because delivered rendering and download behavior cannot be fully evaluated from the editor alone.
Troubleshoot Image Compression
If the image looks blurry, increase the quality setting or start with a higher-resolution source. If the file remains large, check the pixel dimensions of the source artwork and remove image content that will never be visible in the final crop. If colors or transparency change, use an asset format appropriate for those requirements rather than forcing JPEG.
Optimize only after the image and crop are final. Replacing the artwork later may require a new quality review. Keep an original copy of important brand or product graphics outside the email document so you can return to an uncompressed source when necessary.
How Can We Help?